How to Fix an Air Conditioner Fan Not Working: A DIY Guide
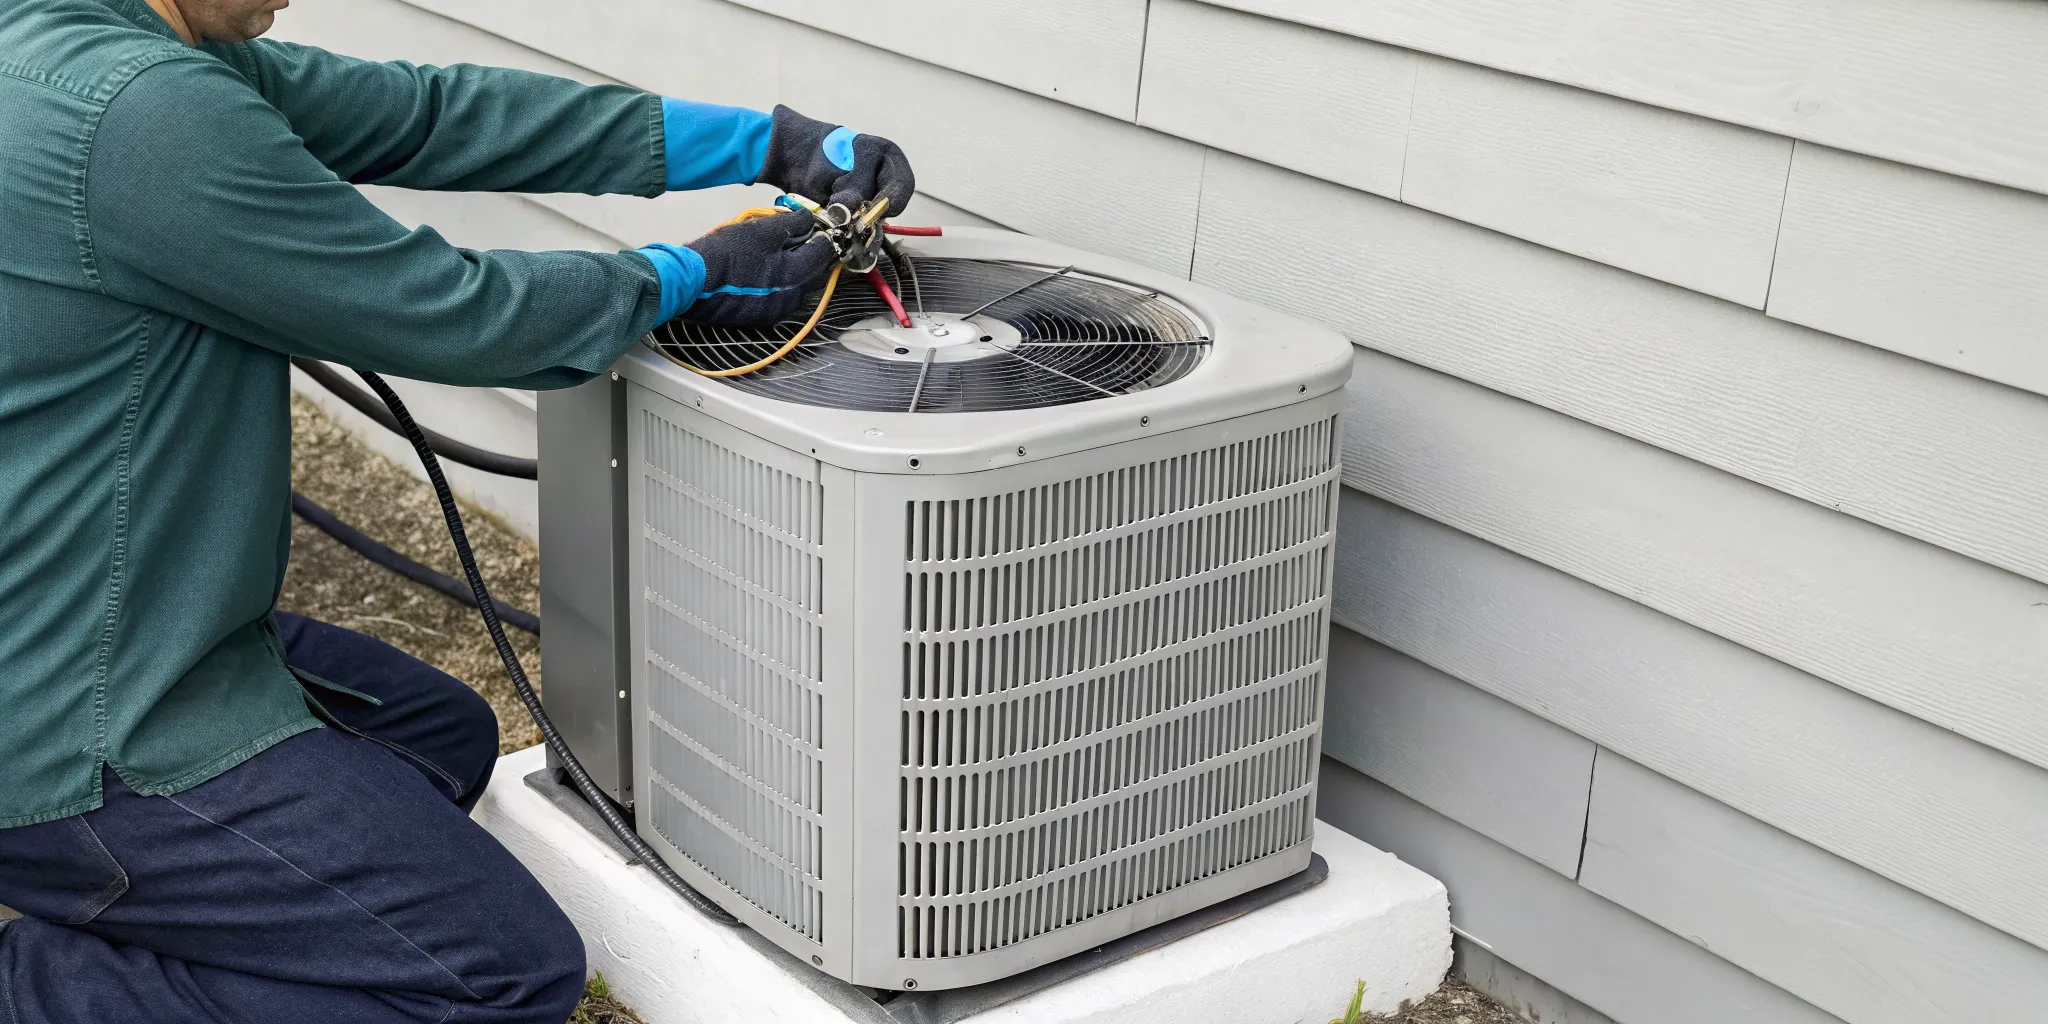
Your air conditioner often gives you clues before it fails completely. A strange rattling noise, a humming sound with no movement, or lukewarm air from the vents are all symptoms of a problem. Think of yourself as a detective; figuring out what’s wrong is the first step. This guide will help you interpret those clues and understand the common causes behind a fan failure. We’ll show you how to determine if it’s an electrical issue, a bad part, or simple debris. Learning how to fix air conditioner fan not working starts with a proper diagnosis, and we’ll show you exactly where to look.
Key Takeaways
- Know the warning signs: Pay attention to unusual sounds, weak or warm airflow, and a non-spinning outdoor fan. These symptoms often point to common issues like a dirty filter, a tripped breaker, or a bad capacitor.
- Prioritize safety above all else: While you can safely reset a breaker or clear debris after turning off the power, leave electrical work to the pros. Handling components like capacitors or fan motors without training is dangerous and can cause bigger problems.
- Practice proactive maintenance: You can prevent most fan issues with three simple habits. Change your air filter regularly, keep your outdoor unit clear of plants and debris, and schedule an annual professional tune-up to catch problems early.
5 Signs Your AC Fan Is Failing
Before you can tackle a fix, you need to know what you’re looking for. An air conditioner fan that’s on the fritz will usually give you a few warning signs. Paying attention to how your AC looks, sounds, and feels can help you catch a problem early, potentially saving you from a total system breakdown on a sweltering Florida afternoon. Here are five common signs that your AC fan is failing.
No Air from the Outdoor Unit
Walk outside and take a look at your condenser unit. Is the fan spinning? You should feel a steady flow of warm air being pushed out from the top. This fan’s job is to expel the heat that your AC has pulled from inside your home. If the fan isn't moving at all, that heat has nowhere to go. The system can’t cool your home effectively and will continue to run, which can cause the compressor to overheat and fail. This is one of the most obvious signs of a fan problem.
Warm Air Blowing from Vents
If you put your hand up to a vent and feel lukewarm or even warm air, it’s a definite red flag. When the outdoor fan stops working, the cooling cycle is interrupted. The refrigerant can't release its heat, so it can't absorb more heat from your indoor air. Your AC system will keep running, but it will just circulate unconditioned air throughout your home. This not only makes your house uncomfortable but also puts immense strain on the entire system. If you notice this, it's time to investigate a potential air conditioning repair.
Strange Grinding, Rattling, or Buzzing Noises
Your AC unit should produce a consistent, low hum when it’s running. If you suddenly hear loud, unusual noises, listen closely. A grinding or squealing sound can point to worn-out bearings in the fan motor. Rattling might mean the fan blades are loose, bent, or hitting debris inside the unit. A loud buzzing or humming could signal an electrical issue with the motor or capacitor. Don't ignore these sounds; they are your AC's way of telling you something is seriously wrong and needs immediate attention before a small problem becomes a big one.
The Fan Randomly Starts and Stops
Does the fan on your outdoor unit seem to have a mind of its own, starting and stopping for no clear reason? This isn't normal behavior. This intermittent operation often points to an electrical problem. It could be a failing capacitor that can't provide the consistent power the motor needs to run, or the motor itself could be overheating and shutting down to protect itself. This constant starting and stopping is very inefficient and puts a lot of wear and tear on the fan motor and other components, shortening the lifespan of your unit.
A Burning Smell from Your Unit
Of all the warning signs, this is the one that requires the most immediate action. A burning smell coming from your indoor vents or the outdoor unit is a serious issue. It often indicates that the fan motor is overheating to the point of burning out its wire insulation. This is a significant fire hazard. If you smell anything burning, turn off your air conditioner at both the thermostat and the circuit breaker immediately. This isn't a DIY situation; you need emergency air conditioning services to safely diagnose and fix the problem.
Why Isn't My AC Fan Working? Common Causes
When your AC fan stops working on a sweltering Florida day, it’s easy to feel a wave of panic. But before you assume the worst, it helps to know that several common issues could be the culprit. Some are simple fixes you might handle yourself, while others require a professional touch. Understanding what’s going on behind the scenes is the first step to getting that cool air flowing again. From a minor electrical trip to a worn-out part, let's walk through the most frequent reasons your AC fan might have called it quits.
Faulty Capacitor
Think of the capacitor as the component that gives your fan motor the initial jolt of energy it needs to start spinning. If you hear a humming or buzzing sound from your outdoor unit but the fan blades aren't moving, a faulty capacitor is the most likely suspect. Over time, these parts can weaken and fail, especially under the stress of our hot and humid climate. While replacing a capacitor is a quick job for a technician, it involves handling high-voltage electrical components, so it’s best left to a professional. This is one of the most common issues we see during an air conditioning repair service call.
Worn-Out Fan Motor
Just like any mechanical part, the fan motor itself can simply wear out from years of use. If the fan blades won’t spin at all and you’ve ruled out other causes, the motor may have burned out or seized up. You might also notice a grinding or rattling noise before it fails completely. A dead motor is a definite sign that your system needs attention. Replacing a fan motor is a complex task that requires disconnecting wiring and disassembling parts of the unit, making it a job for a licensed and insured technician from a company like 5 Star Air.
Blocked or Dirty Fan Blades
Sometimes the solution is simpler than you think. Your outdoor condenser unit is constantly exposed to the elements, and it’s easy for leaves, twigs, dirt, and other debris to get inside. This buildup can physically block the fan blades, preventing them from turning. In some cases, small animals might even build nests inside the unit. A quick visual inspection can tell you if something is obstructing the fan. Keeping the area around your unit clear is a key part of routine air conditioning maintenance and can prevent this problem from happening in the first place.
Tripped Circuit Breaker or Blown Fuse
Before you suspect a major part failure, always check your home’s electrical panel. A power surge or an overloaded circuit can cause the breaker connected to your air conditioner to trip. Find the breaker labeled for your AC and see if it’s in the “off” or middle position. If it is, flip it completely off and then back on to reset it. Your AC unit also has a separate disconnect box near the outdoor unit with its own breaker or fuses. A simple reset could be all it takes to get your fan running again.
Thermostat Glitches
Your thermostat is the brain of your entire HVAC system, and a simple setting error can make it seem like your AC is broken. First, make sure your thermostat is set to “Cool” and the target temperature is set lower than the current room temperature. If it’s not, the system won’t receive the signal to turn on. If you have a smart thermostat, check its schedule or settings to ensure it hasn’t been accidentally changed to an “away” mode or a different schedule. Sometimes, a quick battery change or a system reboot is all you need.
Safety First: Your Pre-DIY Checklist
Before you roll up your sleeves and start tinkering with your air conditioner, let's talk about safety. Working with HVAC systems involves high-voltage electricity and complex parts. While a DIY fix can feel rewarding, your well-being is the top priority. Going through this checklist first will help you work safely and know when it’s time to pass the job to a professional. A simple mistake can lead to personal injury or more expensive damage to your unit, so taking a few minutes to prepare is a step you can't afford to skip.
Turn Off the Power
This is the most important rule, and there are no exceptions. You must ALWAYS turn off all power to your outdoor A/C unit at the breaker box before touching it. Head to your home's main electrical panel and find the breaker labeled for your air conditioner or condenser unit. Flip it to the "Off" position. For an extra layer of safety, most outdoor units also have a disconnect box mounted on the wall nearby. Open it and pull out the disconnect block or flip the switch. This ensures no electricity can reach the unit while you're working.
Beware of Stored Energy in Capacitors
Even with the power shut off, your AC unit can still hold a dangerous surprise. The capacitor, a small, can-shaped component, works like a battery to give the fan motor the jolt it needs to start. Because of this, capacitors can hold a dangerous electrical charge even when the power is off. Touching a charged capacitor can result in a severe electrical shock. Professionals use special tools to safely discharge them before handling. If you're not trained in how to do this, it's a clear sign to stop and call for expert help.
Gather Your Tools and Materials
Nothing is more frustrating than getting halfway through a project only to realize you don't have the right part or tool. Before you begin, make sure you have everything you need. This might include a screwdriver set, a multimeter to test for electricity, and any replacement parts. If you suspect a bad capacitor, for example, you can often buy a replacement at a hardware store, but you need the correct one for your unit. Check the specifications (like voltage and microfarad rating) on the side of the old capacitor and get an exact match.
Know When to Step Away
There is no shame in knowing your limits. If at any point you feel unsafe or unsure, it's time to stop. Don't risk injury from electricity or cause further damage to your system. Your safety is worth more than the cost of a service call. Furthermore, if the simple DIY fixes don't work, you likely have a bigger problem that needs a technician. When you've checked the basics and the fan still won't spin, it’s the smartest move to call in a professional. An experienced technician can diagnose the issue correctly and fix it safely.
Which Fan Is It? Indoor vs. Outdoor
When your AC stops blowing cool air, a faulty fan is a likely suspect. But before you can get to the "how-to-fix-it" part, you need to play detective. Your air conditioning system uses two separate fans to keep your home comfortable: an indoor blower fan and an outdoor condenser fan. One pushes cool air into your house, while the other pushes heat out. Identifying which one is on strike is the first and most important step in diagnosing the problem. Let's figure out how to tell them apart and check their status.
Checking the Outdoor Condenser Fan
Your outdoor unit has a large fan, usually visible through a grille on top. This is the condenser fan, and its job is to push hot air away from your home, releasing the heat that the AC system has removed from inside. If this fan isn't spinning, your system can't get rid of that heat and will quickly overheat, failing to cool your house. To check it, carefully look at your outdoor unit. You should hear it running and see the blades spinning. If it's silent and still, you've found your problem. Common issues range from a tripped breaker to a bad capacitor or a burnt-out fan motor, which often requires a professional air conditioning repair.
Checking the Indoor Blower Fan
The indoor fan, or blower fan, is hidden inside your air handler (the indoor part of your AC system, often in a closet, attic, or garage). Its job is to blow the cooled air through your ductwork and into your rooms. If this fan is the problem, you'll notice that no air, or very weak air, is coming out of your vents, even if you can hear the outdoor unit running. A super common and easy-to-fix cause is a dirty air filter that's so clogged it's blocking airflow. Before assuming the worst, check your filter and replace it if it's dirty. This simple step can improve your system's performance and your home's indoor air quality.
How to Fix Your AC Fan: A Step-by-Step Guide
When your AC fan stops working, it can feel like a major crisis, especially in the Florida heat. But before you panic, there are several troubleshooting steps you can take on your own. We’ll walk through the process from the simplest fixes to the more technical ones. Remember to always prioritize your safety. If you ever feel unsure or uncomfortable with a step, it’s always best to stop and call a professional. Let’s get started on figuring out what’s going on with your fan.
Step 1: Check Your Thermostat
First, let's make sure the problem isn't just a simple settings issue. Go to your thermostat and confirm it’s set to “Cool.” Next, check that the temperature is set at least a few degrees lower than the current room temperature. If it’s not, the system won’t have a reason to turn on. For smart thermostats, you might also want to check the programmed schedule to ensure it hasn’t been accidentally changed. Sometimes the easiest fix is the right one, so it’s always worth double-checking your settings before moving on to more complex steps.
Step 2: Reset the Circuit Breaker
If your thermostat settings are correct, the next step is to check your home’s electrical panel. Your air conditioner is a high-powered appliance and has its own dedicated circuit breaker. Find your breaker box and look for a switch that is flipped to the “Off” position or is stuck in the middle. Flip it completely off and then back on to reset it. You should also check for a disconnect switch, which is usually in a metal box located near your outdoor condenser unit. Make sure this switch is also in the “On” position before you test your system again.
Step 3: Clear Debris from the Outdoor Unit
Your outdoor unit needs clear, unobstructed space to function properly. Before you do anything, make sure you have turned off the power at both the circuit breaker and the outdoor disconnect switch. Once the power is off, take a look at your condenser unit. Over time, leaves, grass clippings, dirt, and even animal nests can build up inside and physically block the fan blades from spinning. Carefully clear away any visible debris from around and inside the unit. A gentle spray with a garden hose can also help clean the fins, but avoid using a high-pressure washer, which can cause damage.
Step 4: Inspect the Air Filter
A clogged air filter is one of the most common culprits behind AC problems. When the filter is packed with dust and dirt, it restricts airflow to the indoor blower fan. This can cause the system to overheat and shut down, or it can make the fan motor work much harder than it should, leading to failure. Locate your indoor air handler and check the filter. If it looks dirty, replace it with a new one that matches your system’s requirements. Regular filter changes are a key part of routine air conditioning maintenance and can prevent many future issues.
Step 5: Look for Capacitor Damage
If the simple fixes haven't worked, it’s time to look at some of the components. The run capacitor is a small, cylinder-shaped part that gives the fan motor the jolt of energy it needs to start and run. A failing capacitor is a very common reason for a fan to stop spinning. After turning off all power to the unit, open the access panel on your outdoor condenser. Look for the capacitor. Signs of a bad capacitor include a bulging or swollen top, leaking oily fluid, or visible corrosion. If you see any of these signs, the capacitor likely needs to be replaced.
Step 6: Replace the Capacitor
Replacing a capacitor is a task some homeowners can handle, but it requires extreme caution. Capacitors can store a dangerous electrical charge even when the power is off. After shutting off the power, you must safely discharge the capacitor by carefully touching the metal shaft of an insulated screwdriver across its terminals. Once discharged, take a photo of the wiring so you remember where everything goes. Then, disconnect the wires, remove the old capacitor, and install the new one, making sure it has the exact same voltage and microfarad (µF) ratings. If this sounds too technical, it’s a fast and affordable job for a licensed technician.
Step 7: Inspect the Contactor and Wires
While you have the access panel open, take a moment to inspect the contactor and wiring. The contactor is an electrical switch that sends power to the fan motor and compressor when the thermostat calls for cooling. Look for signs of wear, such as pitted or blackened contacts, or even insects that have gotten stuck inside and caused it to fail. Also, gently check the wires connected to the capacitor, contactor, and fan motor. Look for any connections that are loose, frayed, or burnt. A loose wire can easily interrupt power and stop the fan from working.
Step 8: Reset and Test Your System
After you’ve worked through the previous steps, it’s time to see if your efforts paid off. Make sure all access panels are securely back in place. Then, go to your circuit breaker and the outdoor disconnect switch and turn the power back on. Set your thermostat to cool and lower the temperature to activate the system. Wait a few minutes to see if the outdoor fan begins to spin and if cool air starts coming from your vents. If it works, great! If not, you’ve done all the DIY troubleshooting you can, and it’s time to call for professional help.
When to Call a Professional for AC Fan Repair
While it feels great to fix something yourself, some AC issues are best left to the experts. Knowing your limits is key to avoiding a bigger, more expensive problem or, worse, a safety hazard. If you’ve tried the basic troubleshooting steps and your fan still isn’t working, it’s time to put down the tools and pick up the phone. Certain repairs require specialized knowledge and equipment that only a licensed technician has. Here are a few situations where calling for professional air conditioning repair is the smartest and safest move.
If the Fan Motor Is Burnt Out
A dead fan motor is a clear sign you need professional help. If you’ve checked the power and the capacitor seems fine, but the fan blades won't spin at all, the motor has likely failed. You might hear a humming sound as the motor tries to start but can't. Replacing a fan motor involves disconnecting complex wiring and handling heavy components, which can be tricky and dangerous. As experts at Carrier note, if the outdoor fan blades don't spin, the motor might be broken and you should call a professional. This isn't a simple swap; it requires a precise diagnosis to ensure the motor is the true culprit.
If You Suspect an Electrical Issue
When it comes to your home’s electrical systems, it’s always better to be safe than sorry. If you see frayed wires, signs of scorching on the control board, or a faulty contactor, don't attempt a DIY fix. These are complex electrical problems that require an expert. A professional technician can safely diagnose issues with circuit boards and other major components without risking damage to your system or personal injury. Trying to handle these repairs yourself can lead to electrical shock or create a fire hazard. Our licensed and insured technicians have the training to handle these situations safely and effectively.
If Your AC Unit Is Over 10 Years Old
Air conditioners, especially in the demanding Florida climate, have a finite lifespan. If your unit is more than 10 years old and experiencing frequent issues like fan failure, it might be time to consider a replacement. Pouring money into constant repairs on an aging system can become a financial drain. An older unit will also be less energy-efficient, costing you more on your monthly utility bills. Instead of another repair, investing in a new, high-efficiency system could be a more cost-effective solution in the long run. We can help you weigh the costs and benefits of repair versus air conditioning installation and replacement.
Why DIY Isn't Always Cheaper in Florida
In a place where a working AC is a necessity, not a luxury, a failed DIY repair can leave you in a hot spot. Attempting to fix electrical parts or the motor yourself is not only dangerous but can also void your manufacturer's warranty, leaving you on the hook for the full cost of a professional repair or replacement. A small mistake can cascade into a much larger system failure. Getting a professional diagnosis ensures the problem is fixed correctly the first time, saving you from repeat headaches and potentially bigger bills down the road. When you’re ready for an honest assessment, contact us for help.
How to Prevent Future AC Fan Problems
After you’ve gone through the trouble of fixing your AC fan, the last thing you want is a repeat performance. Thankfully, a little proactive care can go a long way in preventing future headaches and keeping your home cool. Think of it as simple insurance against another sweltering Florida afternoon without AC. These three habits are the cornerstones of a healthy, reliable air conditioning system and can save you from costly emergency repairs down the road.
Schedule Annual AC Maintenance
Honestly, this is the single most effective step you can take. Having a professional inspect your system once a year, ideally in the spring before the summer rush, is crucial. During a maintenance visit, a technician can catch and fix small problems, like a weakening capacitor or a motor that’s showing signs of wear, before they cause a complete breakdown. They’ll also clean and lubricate moving parts, ensuring everything runs efficiently. Regular air conditioning maintenance is the best way to extend the life of your unit and keep it running strong through the long, hot Florida summers. It’s a small investment that prevents much larger, sweatier problems.
Keep Your Outdoor Unit Clear of Debris
Your outdoor condenser unit needs room to breathe. When airflow is blocked, the system can’t effectively release heat, which puts a major strain on the fan and other components. Make it a habit to check the area around your unit. Trim back any shrubs, weeds, or palm fronds to maintain at least two feet of clear space on all sides. After mowing the lawn or during stormy weather, check for grass clippings, leaves, and other debris that might have collected around the unit or even inside the grille. If you see anything blocking the fan blades, always turn off the power at the breaker before attempting to clear it. This simple cleanup routine helps prevent overheating and potential AC repairs.
Change Your Air Filters Regularly
This is the easiest and cheapest way to prevent a whole host of AC issues. A clogged air filter forces your system’s indoor blower fan to work much harder to pull air through. This strain can lead to the motor overheating and eventually burning out. A severely blocked filter can also restrict airflow so much that it causes ice to form on the evaporator coils, which can lead to water damage when it melts. Check your filter every month and change it when it looks dirty, which is typically every 30 to 90 days depending on your home. Keeping up with this simple task not only protects your fan motor but also improves your home’s indoor air quality.
Related Articles
- 5 Signs Your AC Needs Repair
- Benefits of Regular HVAC Maintenance
- HVAC Tips & Insights Blog - Expert Advice from 5 Star Air
- AC Repair Services
- Maintenance Services
Frequently Asked Questions
My outdoor fan is humming but the blades aren't moving. What does that mean? A humming sound without any fan movement is a classic sign of a bad capacitor. The capacitor is a small part that provides the initial jolt of energy to get the fan motor spinning. When it fails, the motor tries to start but can't, which creates that distinct humming noise. While this is a very common and relatively simple fix for a technician, it involves handling high-voltage components, so it's a repair best left to a professional.
How can I tell if the problem is with my indoor fan or the outdoor one? The easiest way to tell is by checking your vents. If you put your hand up to a vent and feel no air coming out at all, the issue is likely with your indoor blower fan, which is located inside your air handler. If you feel air coming from the vents but it's warm or lukewarm, the problem is more likely with your outdoor condenser fan, which is responsible for expelling heat from the system.
My fan seems to be working, but the air from my vents is still warm. What could be wrong? When the outdoor fan stops working correctly, the entire cooling cycle is broken. That fan's job is to push heat away from your home. If it fails, the heat gets trapped in the system. This means the refrigerant can't get cold enough to cool the air being blown into your house. Your system will keep running, but it will just circulate unconditioned, warm air, which also puts a huge strain on your compressor.
Is it really that important to turn off the power before I look at my AC unit? Yes, this is the most critical safety step and it is not optional. You must turn off the power at two locations: the main circuit breaker in your home's electrical panel and the outdoor disconnect switch, which is usually in a metal box on the wall near the unit. Even with the power off, the capacitor can still hold a dangerous electrical charge, which is why we always recommend calling a professional for any repair that involves opening the unit's access panel.
How often should I have my AC professionally maintained to avoid fan problems? Scheduling a professional maintenance visit once a year is the single best thing you can do to prevent fan failure and other common AC issues. An annual tune-up, ideally in the spring before the summer heat arrives, allows a technician to clean the components, lubricate moving parts, and spot wearing parts like a weak capacitor or aging motor before they fail completely. This small investment helps your system run efficiently and can save you from a much more expensive emergency repair down the line.