How to Replace Ductwork in Attic: A Complete Guide
Are you constantly battling hot and cold spots in your house? Does your energy bill seem to climb higher every summer, no matter what you do? These common frustrations often point to a single, hidden culprit: your attic ductwork. Over time, ducts degrade, tear, and leak, forcing your AC system to work overtime just to keep up. Deciding to replace them is a big step, but it’s one of the smartest investments you can make in your home’s comfort and efficiency. We’ve created this detailed guide to demystify the process of how to replace ductwork in attic spaces, covering the tools you’ll need, the mistakes to avoid, and how to ensure your new system performs perfectly.
Key Takeaways
- Listen to your home's warning signs: If you're dealing with inconsistent temperatures, rising energy costs, or know your home is over 20 years old, your attic ductwork is the likely culprit. These issues signal that your conditioned air and money are leaking away.
- Prioritize a quality installation over a quick fix: A successful duct replacement depends on precise details like correct sizing, strategic layout, and airtight sealing at every connection. Getting these elements right is the difference between a lasting solution and a recurring problem.
- Treat your new ductwork as a long-term asset: The job isn't finished after installation. Verify the system's performance with professional testing and schedule regular inspections and cleanings to protect your investment, ensure healthy air quality, and keep your system running efficiently.
Is It Time to Replace Your Attic Ductwork?
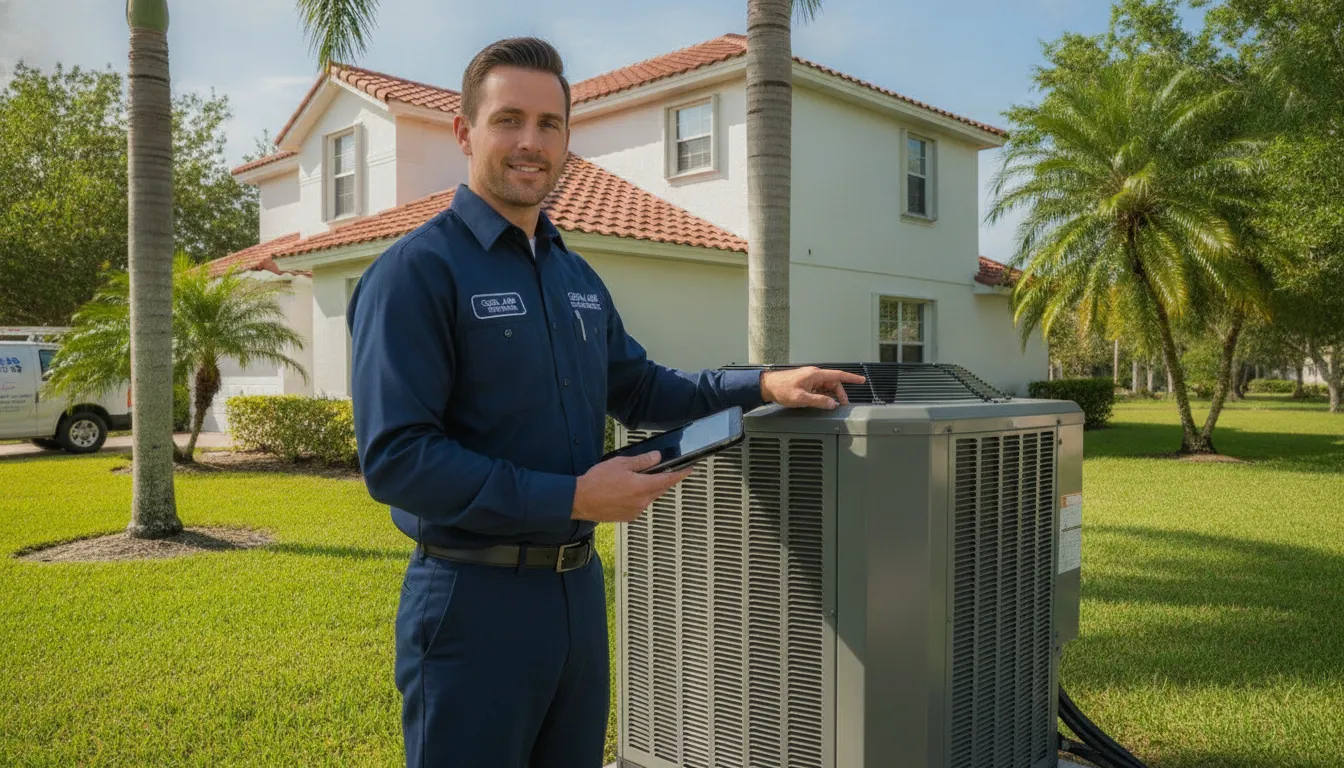
Your home’s ductwork is like its respiratory system, circulating conditioned air to keep you comfortable. But since it’s tucked away in the attic, it’s easy to forget about. Over time, however, ducts can degrade, leak, and become inefficient, causing a host of problems you might be blaming on your AC unit itself. If you’re noticing issues with your home’s comfort or your utility bills, your ductwork could be the culprit.
So, how do you know when it’s time for a replacement? It’s not always obvious, but there are several clear signs that your ducts have seen better days. From hot spots in your living room to a sudden spike in your energy costs, these symptoms point to an inefficient system that’s costing you money and comfort. Let’s walk through the four biggest red flags that signal it’s time to take a look at what’s happening in your attic.
Poor airflow and uneven temperatures
Do you have a room that feels like a sauna while another feels like an icebox? This frustrating temperature imbalance is a classic sign of ductwork problems. When ducts have leaks, kinks, or improper seals, the conditioned air from your AC unit can’t reach its destination effectively. Instead of flowing directly to your vents, that cool air gets lost along the way.
In a hot Florida attic, leaky ducts can also pull in scorching, humid air. One study found that air entering an AC unit from a leaky attic was 20 degrees hotter than the air inside the house. This forces your system to work much harder to cool your home, leading to those annoying hot and cold spots. If you’re constantly fiddling with the thermostat, it might be time for an air conditioning repair technician to inspect your ducts.
Rising energy bills
If your monthly energy bill is creeping up without a clear reason, your attic ductwork is a prime suspect. Old or damaged ducts are often riddled with holes, disconnected joints, and deteriorating insulation. Every little gap allows the precious cool air you’re paying for to escape into the attic instead of cooling your living spaces.
Think of it like trying to fill a leaky bucket—you just keep pouring more in, but it never gets full. Your AC system is forced to run longer and more frequently to compensate for this lost air, which directly translates to higher energy consumption. Investing in new, properly sealed ductwork ensures that conditioned air gets where it needs to go, which can significantly lower your monthly bills and reduce the strain on your HVAC unit.
Visible damage and deterioration
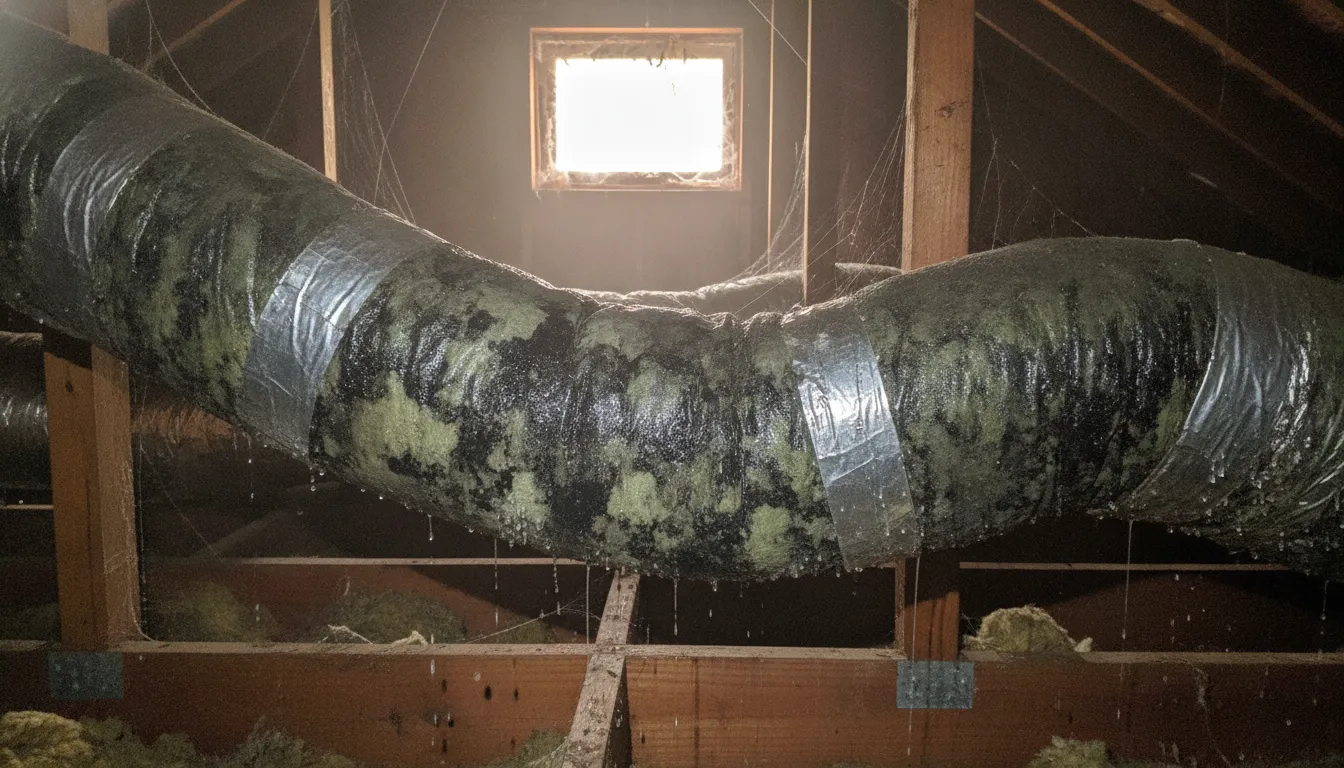
Sometimes, the proof is right there if you know what to look for. If you can safely access your attic, a quick visual inspection can reveal a lot. Look for obvious signs of damage like tears, holes, or sections that are crushed or kinked. You might also see peeling insulation or disconnected joints where ducts are supposed to meet.
Older materials, especially duct board, can become brittle and fall apart over time. Technicians often find that old duct board practically crumbles in their hands during removal. If you see signs of moisture, mold, or excessive dust around the ducts, it’s a clear indicator that the system is compromised. Addressing this isn’t just about efficiency; it’s also about your home’s indoor air quality.
Age of existing ductwork
Like any other part of your home, ductwork has a finite lifespan. Most experts agree that ducts should be replaced every 15 to 25 years. After this point, the materials begin to break down, seals fail, and the system becomes far less efficient, no matter how well it was installed initially.
Even if your ducts look fine from a distance, the adhesives and materials used two decades ago simply don’t hold up forever, especially in the extreme heat of a Florida attic. If your home is more than 20 years old and you’re still using the original ductwork, it’s almost certainly leaking and costing you money. Proactively replacing it can improve your comfort, lower your bills, and give you peace of mind. When you work with an experienced team, you can trust the job will be done right.
DIY vs. Hiring a Pro: What's Right for You?
Tackling a home improvement project yourself can be satisfying, but when it comes to ductwork, it's smart to weigh the pros and cons. While some minor duct repairs are doable for a handy homeowner, a full replacement is a complex job that directly impacts your home's comfort and your HVAC system's health. The right choice depends on the scope of the project, your skill level, and your comfort with the potential risks.
When DIY makes sense
If you’re dealing with a minor, isolated issue, a DIY fix can be a good option. Tasks like sealing a small, accessible leak with mastic tape or reattaching a single loose duct are often straightforward. Fixing these small problems can improve your AC's performance and make your home feel cooler. Just remember, this work usually means crawling into a hot, cramped attic. For a simple, one-off repair where you can clearly see the problem and the solution, going the DIY route can save you a few dollars.
When to call the professionals
If your ductwork issues are more widespread, it’s time to call in the experts. A full replacement requires a deep understanding of airflow, system balance, and local building codes. Simply replacing old ducts with new ones of the same size won't solve underlying efficiency problems. Professionals follow a detailed process to design and install a system that works for your home. For complex layouts, hiring an experienced contractor for duct cleaning and replacement ensures the job is done right, preventing future headaches and efficiency loss.
Cost comparison and safety considerations
While saving on labor costs is the main appeal of DIY, consider the risks. A professional ductwork replacement is an investment that pays off in energy efficiency and system longevity. Doing it yourself can lead to costly mistakes, from using the wrong materials to creating leaks that drive up your energy bills. More importantly, improper installation can violate building codes and void your HVAC system’s warranty. When you hire a licensed and insured team, you’re paying for expertise and safety. You can always contact us for an honest, transparent quote.
How Much Does It Cost to Replace Attic Ductwork?
Let's talk numbers. Replacing the ductwork in your attic is a significant home improvement project, and the cost reflects that. On average, homeowners in Florida can expect to pay around $3,500 for a full replacement. The typical price range falls somewhere between $1,400 and $5,600, but this can vary quite a bit. What causes such a wide range? Several factors come into play, including the size of your home, the accessibility of your attic, the type of materials you choose, and the complexity of the duct layout.
Think of it less as a cost and more as an investment in your home’s health and your family's comfort. New, efficient ductwork can lower your energy bills, improve your indoor air quality, and ensure every room is cooled evenly—a must-have in the Florida heat. When you get a quote, a professional technician will assess these factors to give you a precise figure. At 5 Star Air, we believe in honest, transparent pricing, so you’ll know exactly what to expect before any work begins. We’ll walk you through the options to find a solution that fits your home and your budget.
Material costs breakdown
The material you choose for your new ducts plays a big role in the final price tag. The most common options each have their own pros and cons. Flexible ducts are the most budget-friendly, usually costing between $1 and $4 per foot. They're easier to install in tight spaces but can be less durable and efficient over time. A step up is fiberglass duct board, which runs about $4 to $6 per foot and offers better insulation. For maximum durability and longevity, sheet metal ducts are the top choice. They are the most expensive, ranging from $7 to $13 per foot, but they are built to last and provide excellent airflow when properly sealed.
Labor costs and permit requirements
Beyond the materials, labor makes up a significant portion of your total cost. This isn't just for installing the new ducts; it also covers the careful removal and disposal of the old system, planning the new layout for optimal airflow, and ensuring every connection is perfectly sealed. While a DIY approach might seem tempting, improper installation can lead to leaks and inefficiency, costing you more in the long run. Depending on the scope of your project, a permit may also be required, which can add between $250 and $1,500 to the budget. Our licensed technicians handle this entire process, ensuring your new system is safe, efficient, and up to code.
Budget planning and financing options
Facing a multi-thousand-dollar expense can feel daunting, but it's helpful to remember the long-term benefits. New ductwork can significantly reduce your monthly energy bills and prevent costly future repairs, making it a smart financial move for your home. When you're ready to move forward, planning your budget is the first step. We understand that this is a major investment, which is why we offer flexible financing options to help make the project more manageable. This allows you to get the essential work done now and pay over time, so you don’t have to compromise on comfort or air quality.
Your Ductwork Replacement Toolkit: Tools & Materials
Before you even think about climbing into the attic, let’s talk about what you’ll need to bring with you. Replacing ductwork isn’t a simple weekend project you can tackle with just a screwdriver and some grit. Having the right tools and materials on hand from the start makes the entire process smoother, safer, and far more effective. A well-prepared toolkit is your best friend for this job, ensuring you can handle each step correctly, from removing the old ducts to sealing the new ones. Think of it as setting up your command center—gathering everything you need means fewer trips up and down the ladder and a much lower chance of cutting corners. This preparation is the first step toward a more efficient HVAC system and better air quality in your home. It separates a frustrating, drawn-out ordeal from a successful project that genuinely improves your comfort and lowers your energy bills. Getting this part right sets the tone for the entire replacement.
Safety equipment and protective gear
First things first: safety is not optional. Your attic can be a dusty, tight space, and old building materials can hide some unpleasant surprises. Before you start, gear up with the essentials. You’ll want heavy-duty gloves to protect your hands from sharp edges and rough materials. A good quality respirator or N95 mask is crucial, especially when handling old insulation, which can release dust and fiberglass particles into the air. Safety glasses will shield your eyes from falling debris. It’s also smart to wear a long-sleeved shirt and pants to prevent skin irritation. Protecting yourself ensures the project gets done without any hazardous setbacks to your health and improves your home's indoor air quality.
Cutting and measuring tools
Precision is key when you’re fitting new ductwork. You’ll need a reliable tape measure to get accurate lengths for each duct run. For cutting, a sharp utility knife or specialized flex-duct cutters will work best for the duct material itself. Flexible ductwork has a wire coil running through it, so you’ll also need a pair of diagonal cutters or wire snips to cleanly cut the wire. Having the right cutting tools prevents jagged edges and makes connections much easier to seal later on. This attention to detail is a core part of any successful air conditioning installation, ensuring every component fits perfectly.
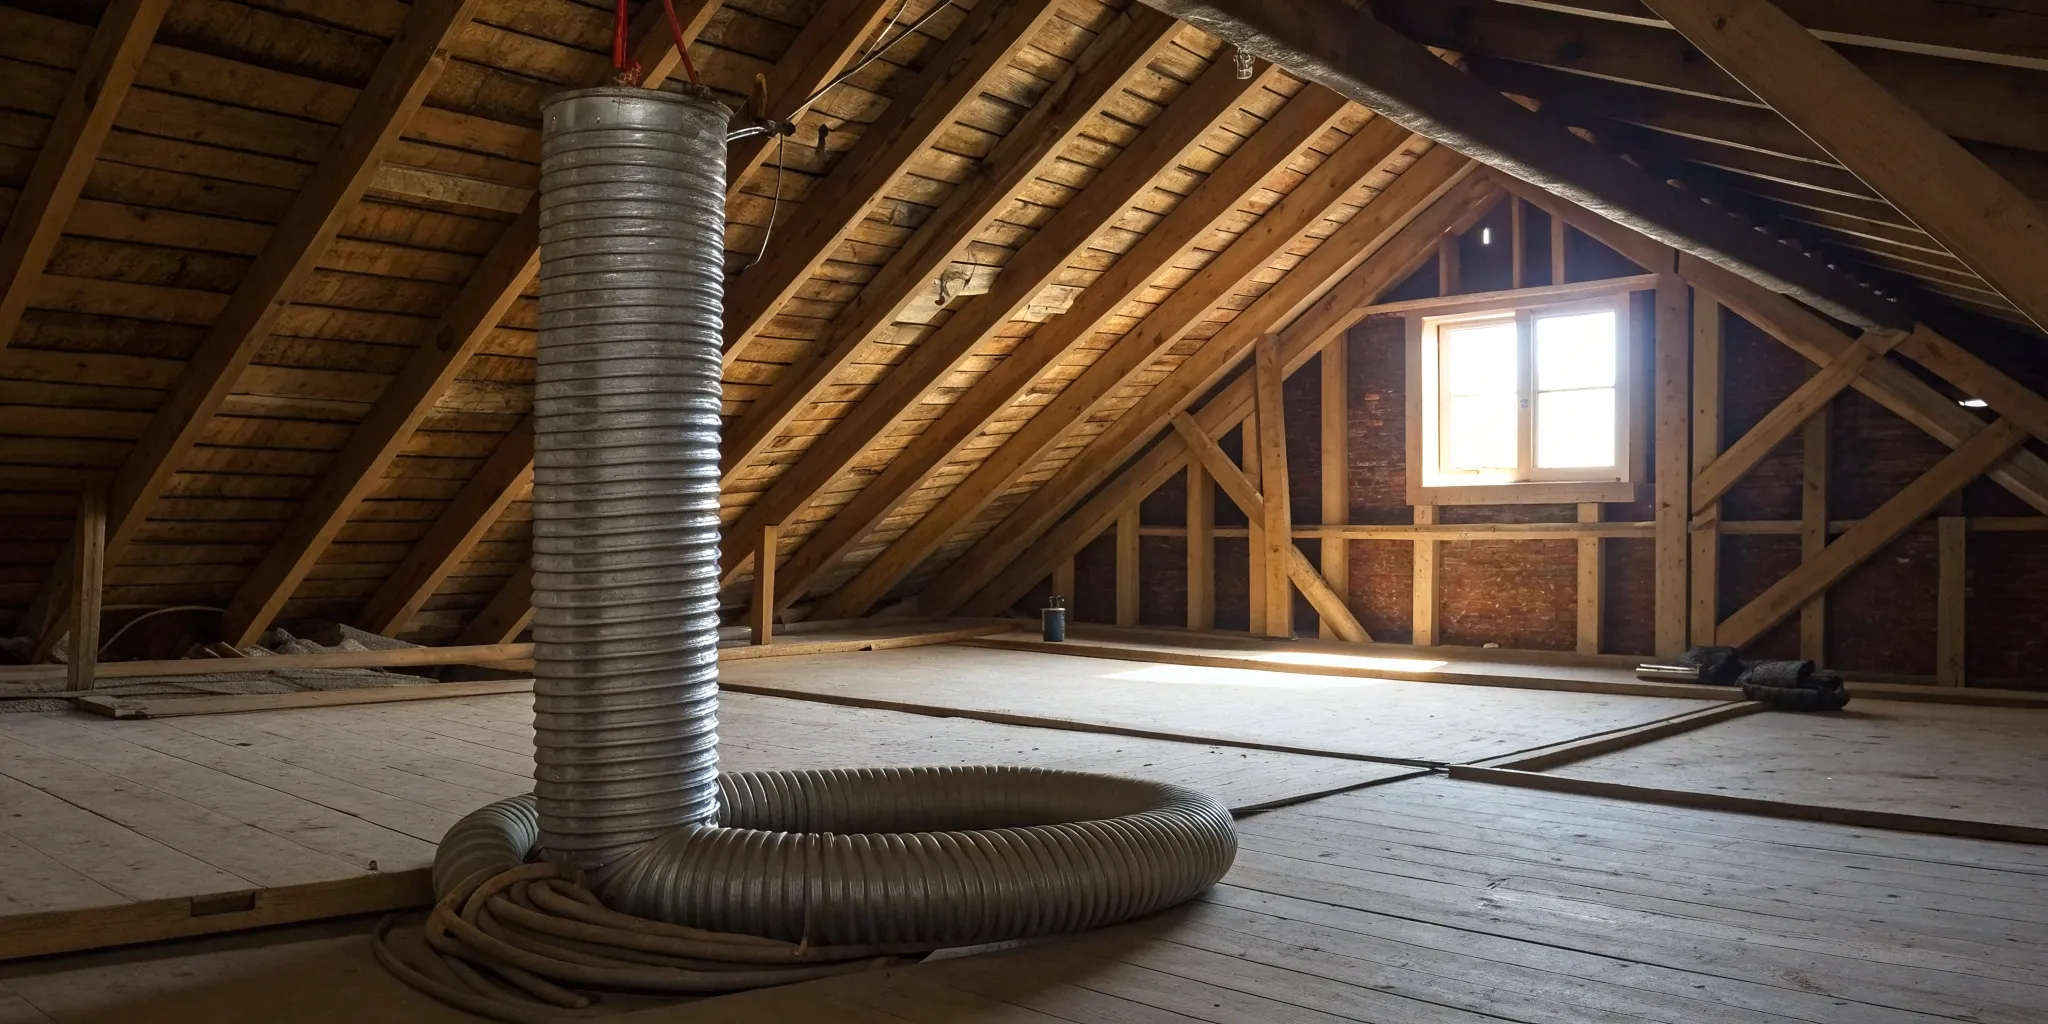
Ductwork materials and connectors
Obviously, you'll need the new ductwork itself. It comes in various diameters (like 6-inch or 8-inch) and insulation ratings, so be sure you’ve purchased the correct sizes for your system’s design. To connect everything, you’ll need zip ties (or panduit straps) to secure the inner liner of the flex duct to the collars and boots. For rigid ductwork, you might use S-clips and zip screws to join sections together. The goal is to create a secure, airtight connection at every joint. If you find the job requires more than you bargained for, our team is always ready to handle your duct replacement needs.
Insulation and sealing supplies
A new duct system is only as good as its seals. Leaky ducts waste energy and money, so this step is critical. The number one tool for sealing is foil tape—not the cloth-backed duct tape you might have in your garage, which will dry out and fail over time. For an even more robust seal, HVAC professionals use mastic, a gummy sealant that you paint over the joints. After connecting the inner liner, you’ll pull the insulation sleeve over the connection and use foil tape or mastic to completely seal the outer vapor barrier. Proper sealing is a cornerstone of routine air conditioning maintenance and essential for system efficiency.
How to Safely Remove Your Old Ductwork
Getting the old ductwork out is the first big step toward better air quality and efficiency. It’s more than just demolition; it’s a careful process that sets the stage for a successful installation. Before you start pulling things apart, it’s crucial to think about safety and have a clear plan. Working in an attic, especially in Florida, comes with its own set of challenges, from intense heat to tight spaces. This part of the job requires patience and the right gear to protect yourself and your home. Let’s walk through how to remove your old ducts safely, from the first cut to the final cleanup.
Safety precautions and working conditions
Your safety should always come first. Attics can be full of hidden hazards, and old duct materials often contain irritants like fiberglass, dust, and mold. Before you even think about starting, gear up with personal protective equipment (PPE). This includes heavy-duty gloves to protect your hands, safety glasses for your eyes, and a good-quality respirator or N95 mask to avoid breathing in harmful particles. It’s also smart to wear long sleeves and pants to prevent skin irritation.
Next, assess your working environment. Make sure you have stable footing by only stepping on the ceiling joists—never on the drywall between them. Bring a reliable headlamp or portable work light, as attics are usually poorly lit. Given the heat, plan to work during the cooler parts of the day and stay hydrated. If this sounds like a lot to handle, remember that our technicians are trained to work in these conditions safely and efficiently during a professional duct sanitization and replacement.
Disconnecting from the HVAC system
With your safety gear on, the first real step is to completely power down your HVAC system at the circuit breaker. This is a non-negotiable safety measure to prevent the system from turning on while you’re working. Once the power is off, you can start disconnecting the old ducts. Begin at the points where the ducts connect to the register boots (the metal pieces that lead to the vents in your rooms) and the plenum (the large box attached to your indoor air handler).
You’ll likely need a utility knife and a pair of wire snips. Carefully cut away any zip ties, metal straps, or thick foil tape securing the ducts to the connection collars. For flexible ducts, you’ll need to slice through the outer insulation and the inner liner to expose the wire coil, which you can then snip. Work methodically from one connection to the next until all the ducts are detached from the main system and the registers.
Proper removal and disposal process
Once everything is disconnected, you can start removing the old ductwork from the attic. It’s often easiest to work in sections, collapsing or folding the old ducts to make them more manageable to carry. If you have a helper, one person can feed the ductwork toward the attic access point while the other pulls it out. This can make the process much faster and safer than trying to do it all on your own.
After you’ve removed all the old materials, you’ll need to dispose of them properly. You usually can’t just leave them on the curb with your regular trash. Check with your local waste management authority for their rules on construction debris. You may need to bag the materials and take them to a designated landfill or transfer station. While this is an extra step, it’s an important one. If you’d rather skip the hassle, you can always get in touch with our team to handle the entire replacement from start to finish.
Installing Your New Ductwork, Step by Step
With your old ductwork out of the way, it’s time for the main event: installing the new system. This process requires precision and attention to detail. A single leaky connection or a poorly supported duct can undermine all your hard work, leading to poor performance and higher energy bills. While we’re breaking down the steps for you here, remember that a professional installation guarantees every component works together perfectly. If you feel out of your depth, our team at 5 Star Air is always ready to provide expert air conditioning installation.
Plan your duct layout and sizing
Before you cut a single piece of duct, you need a solid plan. Start by drawing a map of your current system, noting where the main trunk lines (the large ducts that carry air from the HVAC unit) and runouts (the smaller ducts that branch off to individual rooms) are located. Proper sizing is critical here; ducts that are too small will restrict airflow, while ducts that are too large will reduce air velocity. You’ll need to calculate the desired airflow, measured in cubic feet per minute (CFM), for each room to ensure balanced heating and cooling. This step is complex, and getting it wrong can lead to years of discomfort and inefficiency.
Connect to the main system
Once your layout is planned, you can start connecting the new ducts. Begin at the plenum (the box that distributes air from your HVAC unit) or the register boot (the metal piece connecting the duct to your vent). Carefully slide the inner liner of the new flex duct over the collar on the plenum or boot. Secure it tightly with a zip tie, making sure the tie sits on the raised ridge of the collar for a firm grip. Then, use high-quality foil tape to seal the connection, wrapping it several times to create an airtight bond. A secure connection at the source is the foundation for a leak-free system.
Secure and support ducts properly
Your ductwork needs to be properly supported to maintain consistent airflow. Use duct support webbing or straps to hang the ducts from your attic’s floor joists. The goal is to create gentle, sweeping curves and avoid sharp bends or kinks that can restrict air movement. You also want to prevent sagging. A sagging duct creates low points where air can get trapped and condensation can pool, potentially leading to mold growth and damaging your system. As a rule of thumb, support the ducts every four to five feet to keep them straight and level. This simple step is essential for the long-term health and efficiency of your HVAC system.
Seal joints and install insulation
The final step is to seal every connection and ensure the insulation is properly placed. After connecting the inner liner, pull the outer layer of insulation over the entire connection point. Use foil tape or mastic—a gummy, paint-on sealant—to seal the outer layer completely. Mastic is excellent for creating a flexible, durable, and airtight seal on all seams and joints. Don't leave any gaps. Every bit of conditioned air that escapes into your attic is wasted money. A perfectly sealed system improves your home's indoor air quality and keeps your energy bills in check.
Common Ductwork Mistakes to Avoid
Replacing your attic ductwork can feel like a major win for your home's efficiency and comfort. But even with the best intentions, a few common missteps can turn your project into a source of frustration. Getting the details right is what separates a successful upgrade from a costly do-over. From sizing the ducts correctly to ensuring every connection is airtight, paying attention to these potential pitfalls will help you get the most out of your new system and avoid future headaches. Let's walk through the mistakes that are easiest to make, so you can steer clear of them.
Incorrect duct sizing and airflow calculations
One of the most critical errors in a ductwork replacement is getting the size wrong. It’s easy to assume that bigger is always better, but that’s not the case with airflow. Ducts that are too large for your HVAC system can decrease air pressure, slowing down the airflow to other parts of your home and creating uneven temperatures. On the other hand, ducts that are too small can restrict airflow, forcing your system to work harder and driving up your energy bills. Proper sizing requires careful calculations based on your home’s layout and your HVAC unit’s capacity. This isn't just guesswork; it's a science that ensures balanced, efficient indoor air quality.
Poor sealing and connection problems
Even perfectly sized ducts will fail if they aren't sealed correctly. Every joint, seam, and connection is a potential point for air to escape, and these small leaks can add up to significant energy loss. Simply pushing two pieces together isn't enough. To create a truly airtight system, all connections should be secured and then sealed with mastic, a gooey substance that hardens to create a durable, flexible seal. Skipping this step means your conditioned air will be cooling your attic instead of your living room, undermining the efficiency of your entire HVAC system and wasting money every month.
Ignoring building codes and warranty issues
While the DIY route can be tempting, replacing ductwork is a job that falls under local building codes and manufacturer warranties. Doing the work yourself without the right knowledge or permits can lead to failed inspections, safety hazards, and a voided warranty on your expensive HVAC equipment. Professionals understand the specific requirements for installation, insulation, and sealing in our area. If you’re unsure about any step of the process, it’s always best to contact a licensed technician. A professional installation ensures your system is safe, efficient, and fully compliant, protecting your investment for years to come.
Testing Your New System for Leaks and Performance
You’ve done the hard work of replacing your attic ductwork, but the job isn’t quite finished. The final, and arguably most important, step is to test the new system. This quality check ensures that your investment pays off with better efficiency, lower energy bills, and consistent comfort throughout your home. A professional installation isn't complete without verifying that everything is working exactly as it should.
Think of it like test-driving a new car before you leave the lot. You want to make sure it runs smoothly, and the same goes for your ductwork. Testing involves checking for air leaks, measuring airflow, and confirming that your HVAC system can now do its job without struggling. Skipping this step can lead to the same problems you were trying to solve in the first place, like high energy costs and uneven temperatures. At 5 Star Air, we always perform thorough testing after a duct replacement to guarantee you get the performance you paid for.
Airflow testing and leak detection
First things first, we need to make sure the air is actually going where it’s supposed to. Airflow testing measures the volume of air coming out of each vent, ensuring every room gets the right amount of conditioned air. A technician will set the system’s fan to the proper speed to get an accurate reading, often around 1100 CFM (cubic feet per minute) for an average-sized home.
Leak detection is just as critical. Even tiny gaps or poorly sealed connections can let precious cool air escape into your attic. Professionals use tools like pressure gauges or non-toxic smoke to pinpoint leaks that are invisible to the naked eye. Sealing these leaks is essential for maintaining good indoor air quality and keeping your energy bills down.
System performance verification
Once we’ve confirmed the ducts are airtight and the airflow is balanced, it’s time to verify the entire system’s performance. This is where the details matter. Every connection should be properly secured with mastic, screws, and bands to create a durable, long-lasting seal. This prevents future leaks and ensures your AC system operates at peak efficiency.
A well-performing duct system distributes air evenly, getting rid of those frustrating hot and cold spots. It also reduces the strain on your HVAC unit, which can help it last longer and require fewer repairs. Verifying performance is a key part of any professional air conditioning maintenance plan and is standard practice after any new installation.
Troubleshooting common issues
Even with new ductwork, problems can arise if the installation wasn't handled carefully. Common issues include sharp bends that restrict airflow, flexible ducts that are squished by wires or other objects, or sections resting directly on the hot attic floor, which compromises insulation. These seemingly small mistakes can significantly reduce your system's efficiency.
If you’ve had new ducts installed and something still feels off, don’t hesitate to ask for a performance report. A great way to verify a job well done is to request "before and after" airflow tests to see the improvement on paper. If you suspect a problem with your ductwork, it’s always best to have a professional take a look. A quick air conditioning repair call can save you from bigger headaches down the road.
How to Maintain Your New Ductwork
You’ve put in the work to replace your attic ductwork—now it’s time to protect that investment. Proper maintenance keeps your new system running efficiently for years, ensuring you get the most out of your new setup. Think of it less as a chore and more as a simple routine to keep your home comfortable and your energy bills in check. A little attention goes a long way in preventing small issues from becoming big, expensive problems. By staying on top of inspections, cleaning, and performance, you’re ensuring your HVAC system can do its job effectively, delivering clean, cool air to every room.
Regular inspection schedule
The best way to keep your new ductwork in top shape is to have it professionally inspected regularly. While it might be tempting to peek into the attic yourself, a trained technician can spot subtle signs of trouble you might miss, like tiny leaks, insulation gaps, or early signs of pest activity. We recommend scheduling a check-up at least once a year. A professional maintenance plan not only keeps your system running smoothly but also helps maintain your manufacturer's warranty. It’s a small step that provides peace of mind and prevents surprise repairs down the road.
Cleaning recommendations
Even brand-new ducts will eventually collect dust, allergens, and other airborne particles. Here in Florida, humidity can also create an environment for mold and mildew to grow if left unchecked. We suggest having your ducts professionally cleaned every three to five years to maintain healthy indoor air quality. If you have pets, family members with allergies, or live near a construction zone, you might consider doing it more frequently. A thorough cleaning removes buildup, allowing your system to breathe easier and circulate fresher air throughout your home.
Performance monitoring guidelines
Between professional visits, you can keep an eye on your system’s performance. Pay attention to how your home feels. Are all rooms cooling evenly? Do you hear any rattling or whistling sounds when the AC kicks on? These can be early indicators of an issue. You can also do a quick visual check in the attic to ensure ducts haven't been crushed or pinched by stored items. Your technician sets the fan speed during installation for optimal airflow, but being aware of your system’s normal operation helps you spot when something feels off.
Frequently Asked Questions
Is replacing my ductwork really worth the cost? It’s a fair question, especially since it’s a significant investment. Think of it this way: if your old ducts are leaky, damaged, or undersized, your AC is working overtime to cool your attic instead of your home. New, properly sealed ductwork ensures all that conditioned air gets where it’s supposed to go. This can lead to noticeable savings on your monthly energy bills and a much more comfortable home, making it a smart investment that pays for itself over time.
How long does a full ductwork replacement usually take? For an average-sized home, a professional team can typically complete a full attic ductwork replacement in one full day. Of course, this can vary depending on the size of your home and the complexity of the layout. Our goal is always to get the job done efficiently and with minimal disruption to your routine, so you can start enjoying a more comfortable home as quickly as possible.
Why should I replace my ducts instead of just cleaning them? Duct cleaning is great for removing dust and allergens from a system that's in good shape. However, it can't fix the underlying problems of age and deterioration. If your ducts are over 15 years old, made of brittle materials, or have tears and collapsed sections, cleaning won't solve the efficiency issues. Replacement is the permanent solution for a system that is physically breaking down.
Will new ductwork improve the performance of my existing AC unit? Absolutely. Your AC unit and your ductwork are two halves of the same system. Even a high-efficiency air conditioner can’t perform well if it’s connected to a leaky, poorly designed duct system. By installing new, airtight ducts, you allow your AC to distribute air effectively, reducing strain on the equipment. This can help your unit run more efficiently, cool your home more evenly, and potentially extend its lifespan.
My air conditioning is really noisy. Could my ductwork be the problem? Yes, noisy operation is often linked to ductwork issues. If your ducts are too small for your system, the high air pressure can create a whistling or roaring sound. You might also hear rattling or banging if ducts have come loose from their supports. Properly sized and secured ductwork allows air to flow smoothly and quietly, which can make a huge difference in how peaceful your home feels.