How to Install UV Light for HVAC Step-by-Step

Here in Florida, we know a thing or two about humidity. While it’s great for our tropical plants, it also creates the perfect breeding ground for mold, mildew, and bacteria inside the dark, damp corners of our HVAC systems. These unwanted guests can trigger allergies, create musty odors, and circulate throughout your home every time the AC kicks on. A UV light is a powerful tool to stop this cycle at the source. This guide is designed to give you a clear, straightforward plan on how to install uv light for hvac systems, turning your air handler into a purification powerhouse and making your home’s air noticeably cleaner and healthier.
Key Takeaways
- Clean your air and your AC system: An HVAC UV light neutralizes airborne germs like mold and bacteria, creating healthier air inside your home. It also keeps your system's internal coil clean, helping it run more efficiently and preventing costly buildup.
- Focus on placement and safety: For the best results, install the light so it shines directly on the damp evaporator coil, a prime spot for mold growth. Most importantly, always turn off the power at the circuit breaker before you begin any work to ensure a safe installation.
- Plan for simple, regular upkeep: Your UV bulb loses its germ-killing strength over time, so plan to replace it every one to two years, even if it's still glowing. If you're ever unsure about the installation or wiring, calling a professional is the smartest and safest decision.
What Is an HVAC UV Light?
You’ve probably heard about UV light being used for sterilization, but did you know you can put that same technology to work inside your home’s HVAC system? An HVAC UV light is a special lamp installed within your heating and cooling equipment. Its main job is to neutralize tiny, unwanted guests like mold, bacteria, and viruses that can circulate through your air. Think of it as a silent guardian for your home's air, working around the clock to keep things fresh and clean.
These aren't your average light bulbs. They emit a specific wavelength of ultraviolet light, known as UV-C, which is a powerful germicide. As air passes through your HVAC system, it’s exposed to this light, which purifies it before it ever reaches your vents. This technology is a fantastic way to improve your home’s indoor air quality and add an extra layer of protection for your family. By targeting contaminants at the source, UV lights help create a healthier living environment, which is especially important here in the humid Florida climate where things like mold can thrive.
How UV-C Light Cleans Your Air
So, how does a light actually clean the air? It’s pretty fascinating. The UV-C light emitted from the lamp targets the genetic material (the DNA and RNA) of microorganisms. When germs like bacteria and viruses are exposed to these powerful rays, their DNA is damaged, which effectively scrambles their ability to reproduce. This process stops them in their tracks, preventing them from multiplying and spreading throughout your home. Because the light is installed directly in your HVAC system, it continuously purifies the air as it circulates, neutralizing harmful particles before you even have a chance to breathe them in.
How UV Lights Fight Mold, Bacteria, and Viruses
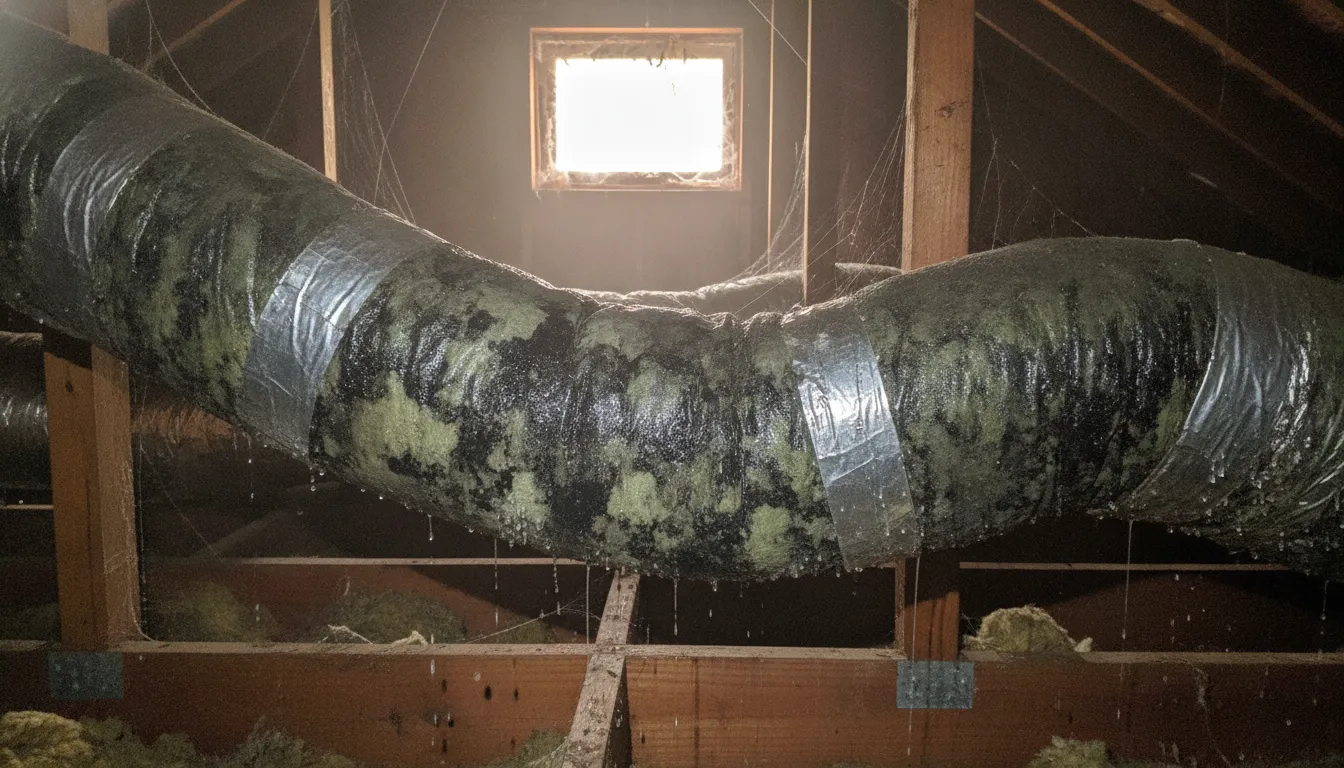
Your HVAC system can be a perfect breeding ground for microorganisms. The dark, damp environment of the evaporator coils, drain pan, and ductwork is exactly where mold, mildew, and bacteria love to grow. UV lights are specifically designed to combat this. By placing a UV lamp near these problem areas, you can eliminate these contaminants right at the source. The UV-C light is particularly effective against mold, as it destroys its DNA and stops it from growing. This not only prevents musty odors but also keeps your system cleaner, which can help it run more efficiently and reduce the need for frequent duct sanitization.
Why Add a UV Light to Your HVAC System?
If you're looking for a way to improve your home's air and keep your AC running efficiently, installing a UV light in your HVAC system is a fantastic solution. Think of it as an extra layer of defense working around the clock. These lights are designed to tackle the invisible problems that standard air filters can miss, like microscopic organisms that thrive in Florida's humid climate. From creating a healthier breathing environment to helping your system perform at its best, a UV light offers some serious benefits for your home and family.
Breathe Cleaner, Healthier Air
One of the biggest advantages of an HVAC UV light is its ability to purify the air circulating through your home. The powerful UV-C light neutralizes airborne pathogens like bacteria, viruses, and mold spores by damaging their DNA and stopping them from reproducing. As air passes through your system, the light essentially zaps these unwanted guests, preventing them from spreading. This process is a game-changer for creating a healthier living space and is a key step toward improving your home's overall indoor air quality. It’s an effective way to give your family an invisible shield against common germs.
Keep Your HVAC System Running Smoothly
A UV light doesn't just clean your air; it also helps keep your HVAC system itself clean. Mold and bacteria love the cool, dark, and damp environment of your system's indoor coil. Over time, this buildup can clog the coil, forcing your AC to work harder and use more energy to cool your home. A strategically placed UV light shines continuously on the coil, preventing this organic growth from ever taking hold. By keeping the coil clean, the light helps your system run more efficiently, which can lower your energy bills and reduce the need for costly air conditioning repair.
Say Goodbye to Allergens and Odors
If you or someone in your family struggles with allergies or asthma, a UV light can bring welcome relief. By neutralizing airborne allergens like mold spores and bacteria, it helps reduce the triggers that can cause respiratory irritation. Beyond allergens, UV lights are also great at eliminating odors. They break down the volatile organic compounds (VOCs) that cause musty smells from mold or other unpleasant household odors. This leaves your home smelling fresher and feeling cleaner. It’s a simple addition that complements services like duct sanitization to create a more comfortable and pleasant indoor environment.
Finding the Right Spot for Your UV Light
Deciding where to install your UV light is just as important as choosing the light itself. The right placement ensures you get the maximum benefit, whether you’re targeting mold growth on your system’s components or sanitizing the air that flows through your home. Think of it as choosing the best vantage point for a security camera; location is everything.
The two most effective spots are near the evaporator coil and inside the return air duct. Each location serves a slightly different purpose, so let’s walk through the pros and cons to help you figure out which is the best fit for your home and your air quality goals.
Option 1: Near the Evaporator Coil
Placing a UV light near the evaporator coil is the most common and highly recommended option. Why here? Your evaporator coil is a dark, cool, and damp environment, which is the perfect recipe for mold and bacteria to set up camp. This buildup can not only tank your system’s efficiency but also introduce nasty contaminants into your air.
By installing the light to shine directly on the coil, you’re providing a constant cleaning solution. The UV-C rays work 24/7 to destroy microbial growth on the coil’s surface and in the drain pan. This keeps your system cleaner, helps it run more efficiently, and stops mold at the source before it can become a bigger problem. This method is a fantastic way to maintain your HVAC system’s health and improve indoor air quality.
Option 2: Inside the Return Air Duct
Another great spot for your UV light is inside the return air duct, which is the duct that pulls air from your home back to the HVAC unit to be cooled. Placing the light here focuses on treating the air itself rather than a specific component. As air flows past the light, the UV-C rays neutralize airborne viruses, bacteria, and other germs before they can be recirculated throughout your house.
This "air-stream" approach is excellent for targeting allergens and pathogens on the move. It’s a proactive way to purify the air your family breathes in every room. While this placement is highly effective for air sanitization, it does less to prevent mold growth directly on the evaporator coil. For comprehensive protection, some homeowners even opt for a dual-light system, with one at the coil and another in the ductwork.
Gathering Your Tools and Materials
Before you dive into the installation, let's get everything you need in one place. Like any good project, preparation is key to a smooth and successful setup. Having all your tools and materials ready to go means you won't have to stop midway through to search for a screwdriver. This simple step saves you time and frustration, letting you focus on getting the job done right. We'll walk through exactly what you need, from basic tools to the specific parts of your UV light kit.
Your Tool Checklist
Think of this as your pre-flight checklist. Most of these are probably already in your toolbox. Grab your safety goggles first, because protecting your eyes is non-negotiable. You'll also need a power drill for creating mounting holes, a set of screwdrivers (both Phillips and flathead are good to have), a tape measure, and a marker for pinpointing where the light will go. It's also a good idea to have a pair of wire strippers and electrical tape handy for the wiring part of the job. Having these items within arm's reach will make the entire process much easier.
Materials and Parts You'll Need
Your UV light kit should come with almost everything you need. Open the box and take inventory. You should find the UV lamp itself, a power supply or ballast, the lamp cable, and mounting hardware like self-tapping screws or a magnetic bracket. Some kits also include helpful extras like a panel sticker to remind you a UV light is installed or a sight glass to safely check if the lamp is working. Every kit is a little different, so always check the manufacturer's manual to confirm you have all the necessary components before you start drilling any holes. These systems are a fantastic part of improving your home's indoor air quality.
Checking Your Electrical Setup
This is the most important preparation step. Before you even touch your HVAC unit, go to your home's circuit breaker and turn off the power to the system. This is a critical safety measure to prevent electrical shock. Once the power is off, you'll want to confirm that your HVAC system's power supply matches the voltage requirements of your new UV light. You can usually find this information on the unit itself and in the UV light's installation manual. If you feel even slightly unsure about handling the electrical wiring, it's always best to stop and contact a professional. Your safety is the top priority.
Safety First: What to Know Before You Start
Before you even pick up a tool, let's cover the most important part of this project: safety. This isn't a step you can skim over. Working with your HVAC system involves electricity and powerful UV light, so taking a few precautions is essential to protect yourself, your home, and your AC unit. Getting this right ensures your project is a success from start to finish, without any unexpected and dangerous surprises. We'll walk through exactly what you need to do to stay safe.
Working Safely with Electricity
First things first: turn off the power. This is non-negotiable. Head to your home's circuit breaker box and flip the switch that controls your HVAC system. If you're not sure which one it is, it's better to turn off the main breaker to be completely safe. You should never attempt to drill holes, handle wiring, or install any component without confirming the power is off. If you have any hesitation about working with your home's electrical system, it's always smartest to call in a professional for air conditioning repair. Your safety is always worth it.
Protecting Yourself from UV Rays
The "UV" in UV light stands for ultraviolet, and the rays are powerful enough to harm your skin and eyes. You wouldn't stare at the sun, and you definitely shouldn't look directly at an active UV bulb. Before you handle or install the light, make sure you have the right protective gear. This includes UV-protective safety glasses and a pair of gloves. This simple step prevents accidental exposure and keeps you safe while you work. It might seem small, but it’s a critical part of a safe installation process.
Shielding Your HVAC System
While UV light is great for zapping germs, it can also damage certain materials inside your HVAC system over time. Components like plastic drain pans, flexible ductwork, and the insulation on wires can become brittle if they're exposed to constant UV rays. To prevent this, you'll want to shield them. The easiest way to do this is with aluminum foil tape. Carefully cover any vulnerable plastic or rubber parts near where you plan to install the light. This extra step ensures your new UV light only cleans your air, without causing any harm to your system. It's a detail our team always covers during an air conditioning installation.
How to Install Your HVAC UV Light, Step by Step
Ready to get started? Installing a UV light is a manageable project if you have some DIY experience. Just follow these steps carefully, and remember, your safety is always the top priority. If you ever feel unsure, especially with the electrical parts, it's always best to call in a professional.
Step 1: Cut the Power and Prep the Area
Before you touch anything, head to your home’s main electrical panel and switch off the circuit breaker connected to your HVAC system. This is the most important step to prevent electrical shock. Once the power is off, put on your safety glasses and gloves. The UV-C light bulb is powerful and can be harmful to your eyes and skin, so it’s best to be protected from the start. Taking these precautions ensures a safe workspace before you begin the hands-on part of the installation.
Step 2: Mount the UV Light
Your UV light kit should come with a template. Use it to mark the exact spot on your ductwork where you’ll install the light, typically near the indoor coil. Carefully cut the opening using a drill and tin snips. Once the hole is ready, insert the UV light unit and secure its housing firmly with the provided screws. A snug fit is key to preventing air leaks later on. This process is similar to other component additions, so taking your time here will pay off. Proper air conditioning installation practices are always important.
Step 3: Connect the Wiring
This is where things get a bit more technical. The UV light needs to be wired into your HVAC system’s low-voltage transformer. You can typically wire it to turn on with the system's blower fan or to run continuously. Read the manufacturer’s instructions carefully to understand the specific wiring diagram for your unit. If you’re not completely comfortable working with electrical wiring, this is the perfect time to stop and get professional help. Your safety is more important than finishing a DIY project, so don't hesitate to contact us for assistance.
Step 4: Secure and Test Your Connections
After the wiring is complete, it’s time for the final touches. Turn the power back on at the circuit breaker to test the light. You should see a blue glow from the unit, confirming it’s working. Next, turn the power back off and use foil tape to seal any gaps around the device to ensure your system remains airtight. Finally, place the included warning sticker on the ductwork near the light. This alerts anyone performing future air conditioning maintenance that a UV light is installed.
Common Mistakes to Avoid During Installation
Installing a UV light might seem straightforward, but a few common slip-ups can make the system less effective or even create new problems. Getting the details right from the start ensures you get all the benefits of cleaner air without any of the headaches. Think of it like baking: if you miss a key step, the final result just won’t be the same. Let’s walk through the most frequent mistakes so you can sidestep them completely. If you ever feel out of your depth, remember that a professional air conditioning installation is always the safest bet.
Placing the Light Incorrectly
Where you position the UV light is everything. The goal is to target the spot where mold, bacteria, and other microbes love to grow, which is usually the evaporator coil. This part of your AC is cool, dark, and damp, making it the perfect breeding ground. For the best results, the light should shine directly onto the coil and drain pan. If you have an A-shaped coil, placing the light in the center, just above it, is ideal. If space is tight, positioning it below the coil near the drip pan can also work. Incorrect placement means the light won't be able to do its job, leaving you with the same air quality issues you were trying to solve.
Mishandling the UV Bulb
It’s tempting to handle the UV bulb like any other lightbulb, but it requires a bit more care. You should never touch the glass with your bare hands. The natural oils on your skin can transfer to the bulb, creating hot spots on the surface when it heats up. These spots can weaken the glass and cause the bulb to burn out much faster than it should, reducing its effectiveness along the way. The fix is simple: always wear clean gloves when handling the bulb. This small step protects your investment and ensures your indoor air quality system performs at its best for its full lifespan.
Skipping Critical Safety Steps
When working with your HVAC system, safety should always be your top priority. Before you even open the access panel, turn off all power to the unit at the circuit breaker. It’s a non-negotiable first step. Next, remember that UV-C light is powerful and can be harmful to your eyes and skin, so never look directly at an illuminated bulb. You also need to protect your HVAC system’s internal components. The constant UV exposure can degrade plastic parts, wire insulation, and flexible ductwork over time. Use aluminum foil tape to shield any vulnerable materials from the light’s rays. Overlooking these safety measures can lead to personal injury or damage to your system, turning a simple DIY into a need for emergency AC services.
Keeping Your UV Light System in Top Shape
Once your UV light is installed, a little upkeep will ensure it keeps your air fresh and your system clean for years to come. Think of it like changing the filter in your AC; it’s a simple but essential task that makes a huge difference. Proper maintenance guarantees your UV light continues to effectively neutralize mold, bacteria, and other airborne irritants. Neglecting it means you won't get the full benefits for your home's indoor air quality. The good news is that keeping your system in peak condition only requires a few straightforward steps. By staying on top of bulb replacements and routine cleanings, you can breathe easy knowing your investment is working hard to protect your home and family.
Know Your UV Bulb's Lifespan
UV bulbs have a set lifespan, and it’s important to know when it’s time for a change. Most UV-C bulbs are designed to run effectively for about 9,000 to 12,000 hours, which typically translates to a replacement every one to two years. A common mistake is waiting for the bulb to burn out completely. While the bulb might still glow blue after its recommended lifespan, its germicidal effectiveness will have dropped significantly. This means it’s no longer powerful enough to neutralize contaminants. Always check the manufacturer’s guidelines for your specific model and mark your calendar for the next replacement to ensure you’re always getting the clean air you deserve.
Simple Cleaning and Maintenance Tips
To keep your UV light working at its best, a quick cleaning every few months is a great idea. Dust and debris can accumulate on the glass surface of the bulb, blocking the UV rays and reducing their effectiveness. Before you do anything, make sure you completely turn off the power to your HVAC system at the breaker. Then, wearing gloves to protect your hands and the bulb from oils, gently wipe the bulb with a soft, lint-free cloth and an alcohol wipe. This simple step, which can easily be added to your regular air conditioning maintenance routine, ensures nothing gets in the way of the light’s cleaning power.
When and How to Replace the Bulb
Replacing the UV bulb every 12 to 24 months is key to maintaining your system’s performance. Even if the light is still on, its ability to destroy germs fades over time. The replacement process is usually as simple as swapping out a regular lightbulb, but safety is paramount. Always cut the power to the unit first. If you’re not comfortable handling the replacement yourself or are unsure which bulb to buy, don’t hesitate to call a professional. A technician can quickly and safely swap the bulb during a service visit. If you need a hand, you can always contact us to schedule a visit with one of our expert technicians.
Know When to Call a Professional
While installing an HVAC UV light can be a rewarding DIY project, there’s absolutely no shame in calling for backup. In fact, knowing your limits is one of the smartest things a homeowner can do. Your HVAC system is a complex and expensive piece of equipment, and a small mistake can lead to big problems. If you find yourself feeling uncertain at any point, it’s always better to be safe than sorry.
A professional installation guarantees that your new UV light is positioned for maximum effectiveness and wired safely, protecting both your system and your home. Think of it as an investment in peace of mind. Our team is always ready to help you improve your indoor air quality without the stress. Sometimes, the best tool for the job is the phone, and making that call ensures everything is done right from the start.
If the Electrical Work Is Too Complex
Let’s be honest: electrical work isn’t for everyone. Your HVAC system is tied directly into your home’s electrical panel, and one wrong move can be dangerous. If you open up your air handler and the wiring looks more complicated than you expected, it’s a good time to pause. When you're dealing with electrical wiring, it's always best to hire a professional if you're not completely comfortable with the process.
Our licensed technicians are trained to handle these connections safely and efficiently. We can ensure the UV light gets the correct power without overloading your system or creating a fire hazard. Don’t risk your safety or your equipment; if you have any doubts, let a professional handle the wiring.
If You're Unsure About Compatibility
Not all UV lights work with all HVAC systems. It’s crucial to make sure the unit you bought is compatible with your specific model. Before you start drilling holes, take a moment to double-check. For some high-end UV light systems, professional installation might even be required to keep the warranty valid. An improper installation could void the warranty on your new UV light and, in some cases, on your HVAC unit itself.
Always look at your HVAC manual for specific instructions, but if the language is confusing or doesn’t mention aftermarket additions, it’s wise to seek expert advice. A professional can verify compatibility, ensure the installation meets manufacturer guidelines, and protect your investment. We can help you with a seamless AC installation or upgrade that keeps all your warranties intact.
Related Articles
- Benefits of Regular HVAC Maintenance
- Indoor Air Quality Services
- HVAC Tips & Insights Blog - Expert Advice from 5 Star Air
- How to Prepare Your HVAC for a Florida Summer
- Schedule HVAC Service - Book Online 24/7
Frequently Asked Questions
Will a UV light significantly increase my electricity bill? Not at all. An HVAC UV light uses a very small amount of energy, comparable to a low-wattage light bulb. In fact, by keeping your system's indoor coil free of mold and buildup, the light helps your air conditioner run more efficiently. This improved performance can actually lead to energy savings that easily offset the minimal cost of running the light.
Is the UV light safe for my family and pets to be around? Yes, it is completely safe. The UV light is installed inside your sealed HVAC system, so the UV-C rays are contained and never enter your living spaces. Your family and pets will only experience the benefits of the cleaner air it produces. The only time for caution is during installation or maintenance, which is why it's important to always turn the power off and avoid looking directly at the bulb.
Can I stop using my regular air filter if I have a UV light? You should definitely keep using your regular air filter. UV lights and air filters perform two different but equally important jobs. Your air filter is designed to trap larger airborne particles like dust, pollen, and pet dander. The UV light, on the other hand, neutralizes microscopic organisms like mold spores, bacteria, and viruses. Using both together gives you the most comprehensive approach to clean indoor air.
How can I tell if the UV light is actually working? Most UV light systems come with a small sight glass or an indicator light on the outside of the unit that allows you to safely see the blue glow of the lamp. However, remember that the bulb will continue to glow long after its germ-killing effectiveness has faded. The best way to ensure it's working properly is to replace the bulb according to the manufacturer's schedule, which is typically every one to two years.
Are UV lights particularly effective for homes in Florida? They are an excellent solution for Florida homes. Our state's high humidity creates the perfect dark, damp environment inside your AC system for mold and bacteria to thrive. A UV light targets this problem right at the source, preventing microbial growth on your indoor coil and in your drain pan. This helps stop musty odors and keeps your air healthier, which is a huge advantage in our climate.