Smart Thermostat Installation: A 7-Step Guide
A smart thermostat does more than just adjust the temperature; it makes your home more responsive to your life. It offers the convenience of cooling your house on your way home from work and the satisfaction of seeing lower energy bills. These devices work quietly in the background to optimize your comfort and efficiency. To get these perks, you just need to get the device on the wall. This guide demystifies the smart thermostat installation process, breaking it down into easy-to-follow instructions. We’ll help you get from the box to a fully functioning smart home upgrade in about an hour.
Key Takeaways
- Check compatibility before you buy: Before purchasing, use the manufacturer's online tool to ensure the thermostat works with your system. A quick check for a C-wire and a strong Wi-Fi signal at the installation spot will prevent major headaches later.
- Label wires by terminal, not by color: Always turn off the power at the breaker first. Then, before disconnecting anything, take a photo and label each wire based on the terminal it's connected to (like R, G, or C), since wire colors are not always standard.
- A professional call is cheaper than a major repair: If you encounter complex wiring, don't have a C-wire, or the system won't turn on after installation, it's best to call a technician. This protects your HVAC system from potential damage and ensures the job is done right.
What Is a Smart Thermostat and How Does It Work?
A smart thermostat is a modern, Wi-Fi-enabled version of your traditional thermostat. Instead of just setting a temperature and leaving it, a smart thermostat gives you control over your home’s climate from anywhere using a smartphone app. Stuck in traffic on a hot day? You can tell your AC to start cooling the house before you even pull into the driveway.
Beyond remote control, these devices are "smart" because they learn your daily routines. Over time, a smart thermostat can figure out when you’re usually home, away, or asleep, and then automatically adjust the temperature to save energy without sacrificing comfort. It’s a simple upgrade that works quietly in the background to make your home more comfortable and efficient.
Key Benefits for Florida Homeowners
Living in Florida means our air conditioners work hard nearly year-round, which can lead to some hefty electricity bills. This is where a smart thermostat really shines. By learning your schedule and automatically adjusting the temperature when you're away, it prevents your AC from running unnecessarily, leading to real savings. Plus, the ability to pre-cool your home before you return means you never have to walk into a stuffy, humid house again. Better temperature management also contributes to better indoor air quality by helping your system control humidity more effectively. It’s all about combining comfort with smarter energy use.
Is Your HVAC System Compatible?
Before you rush out to buy a smart thermostat, it’s important to check if it will work with your current HVAC system. The biggest factor is usually the presence of a "C-wire," or common wire. This wire provides a continuous flow of power to the thermostat, which is necessary for features like the Wi-Fi connection and digital screen. Many newer homes have one, but older systems might not. Most smart thermostat brands have compatibility checkers on their websites where you can see if your system is a match. If you find you don't have a C-wire, it's often best to have a professional handle the air conditioning installation, as it can involve running new wires.
What to Do Before You Start
A little prep work goes a long way in making your smart thermostat installation a success. Before you even think about touching a wire, taking a few minutes to get organized will help the entire process go smoothly and safely. Think of it as setting up your workspace for a fun and rewarding project. By gathering your tools, checking your wiring, and making sure your Wi-Fi is ready, you’re setting yourself up for a quick installation with no surprises. Let’s walk through the three simple things you should do first.
Gather Your Tools and Materials
You don’t need a full workshop for this project, but having the right tools on hand will make the job much easier. Most smart thermostat kits come with screws and wall anchors, but you’ll want to grab a few basics. You will likely need a Phillips head screwdriver and a small flathead screwdriver for the terminal screws. It’s also a great idea to have your smartphone fully charged to take a picture of your current wiring setup. A level is also helpful to make sure your new thermostat doesn’t end up crooked.
Find Out If You Have a C-Wire
This is probably the most important step in your prep work. The C-wire, or "common wire," provides continuous power to your smart thermostat, keeping its screen on and its Wi-Fi connected. To check for one, you’ll need to look at your current thermostat’s wiring. Many older homes in Florida don’t have this wire. If you take off your old thermostat and don’t see a wire connected to the "C" terminal, you might need a C-wire adapter. However, installing an adapter can be tricky. If you’re not comfortable with this step, it’s a perfect time to call a professional to ensure it’s done safely and correctly.
Check Your Wi-Fi Strength
Your smart thermostat needs a stable internet connection to do its job. Before you install it, stand where your thermostat is located and check the Wi-Fi signal on your phone. Do you have a strong, reliable connection? If the signal is weak or spotty, your thermostat may struggle to stay online, which defeats the purpose of having a "smart" device. If your signal is poor, you might need to move your router closer to the thermostat or consider getting a Wi-Fi extender. A strong connection ensures you can control your home’s temperature from anywhere without any frustrating interruptions.
How to Install Your Smart Thermostat: A Step-by-Step Guide
Ready to get your new smart thermostat up and running? It’s a straightforward project that most homeowners can handle in under an hour. The key is to work carefully and follow the instructions. We’ll walk you through each part of the process, from the initial safety checks to the final setup in the app. By taking it one step at a time, you can ensure a safe and successful installation. Let's get started.
Step 1: Turn Off Power at the Breaker
Before you touch a single wire, your first and most important task is to turn off the power to your HVAC system. Find your home's main electrical panel, which is usually in the garage, a closet, or the basement. Look for the breaker that controls your furnace and air conditioner. It might be labeled "HVAC," "Furnace," "AC," or something similar. Flip it to the "Off" position. This is a critical safety measure to prevent electrical shock and protect both you and your equipment from damage. Don't skip this step; your safety is the top priority, and taking this simple precaution ensures you can complete the job without any issues.
Step 2: Confirm the Power Is Off
Once you've flipped the breaker, you need to be absolutely sure the power is off. Go back to your old thermostat and try to change the temperature or turn on the fan. The screen should be blank, and you shouldn't hear your HVAC system click on or start running. If anything happens, go back to the breaker box and find the correct one. This double-check takes only a few seconds and confirms that it's safe to move on to the next part of the installation process. It’s a simple verification that gives you peace of mind before you start handling the wiring.
Step 3: Remove the Old Thermostat and Label the Wires
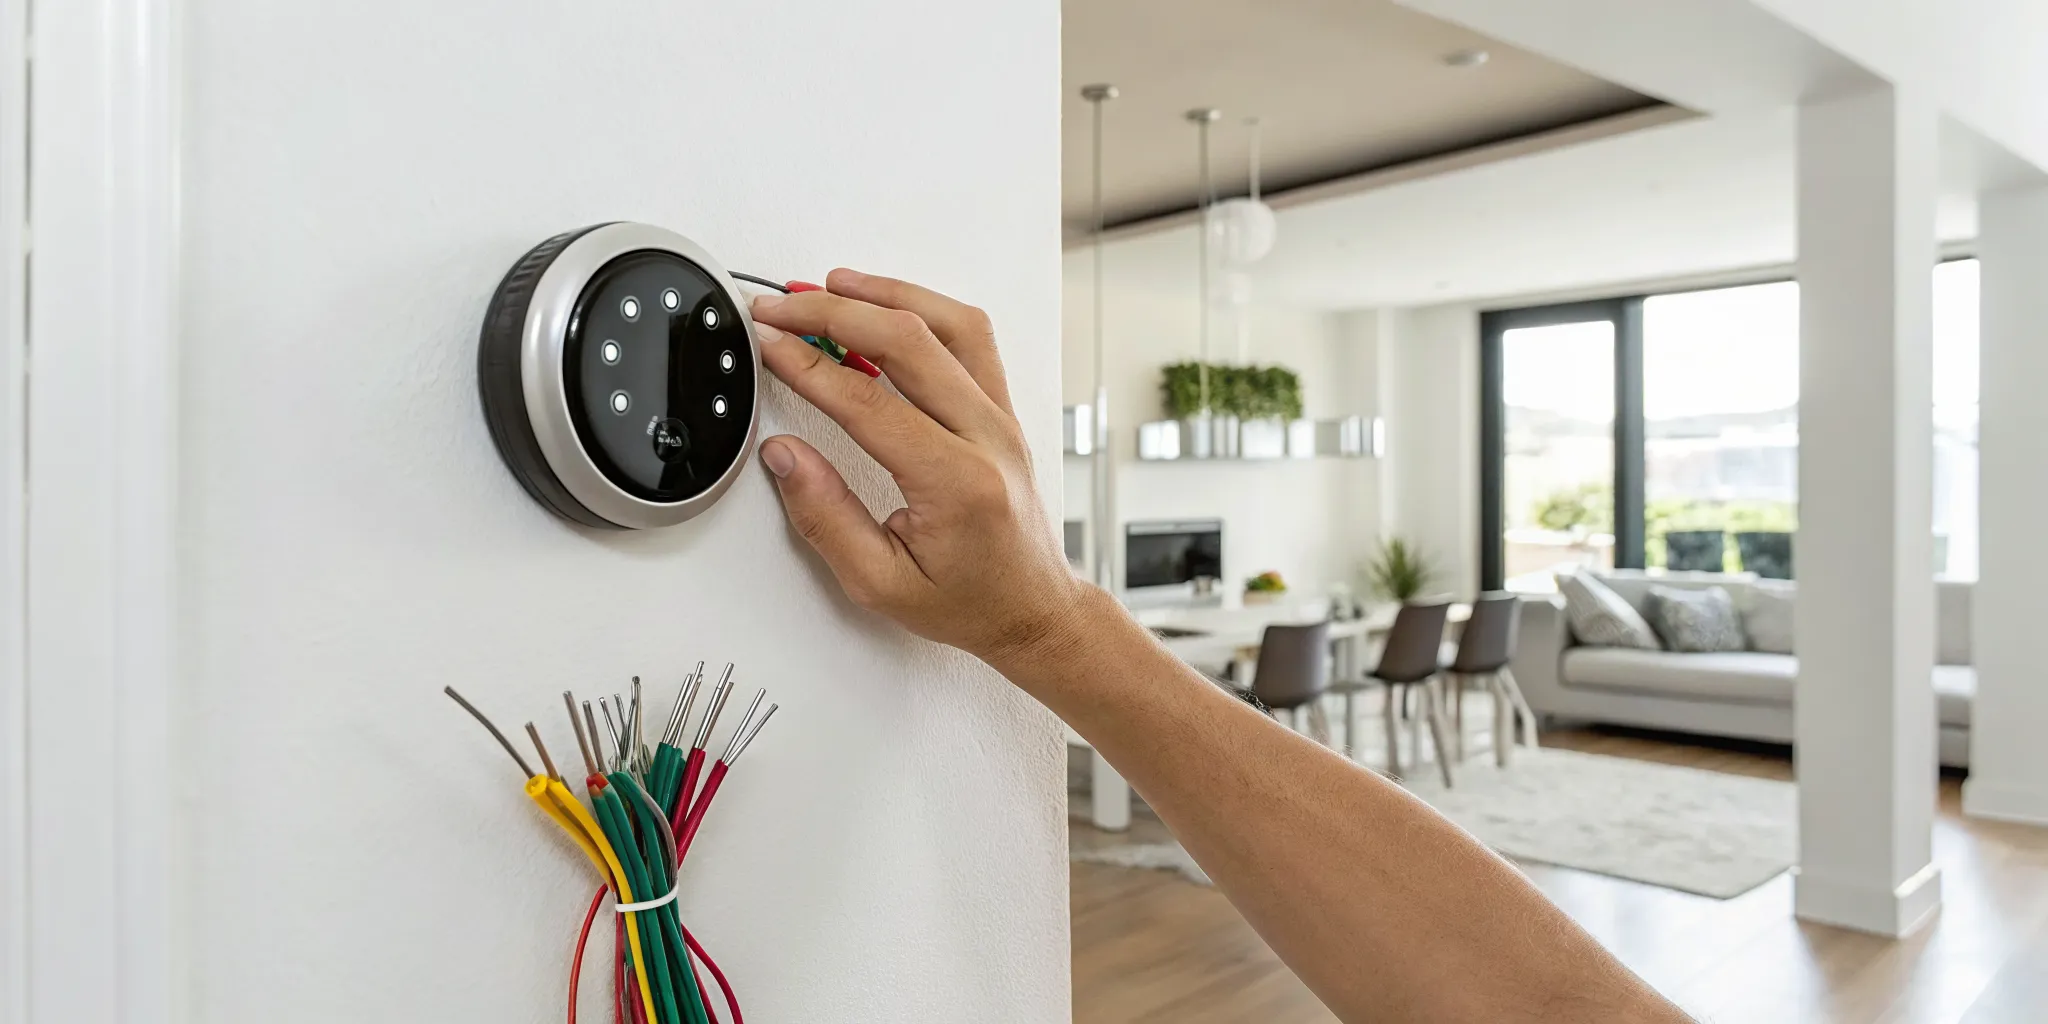
Gently pull the faceplate off your old thermostat. Some models pop right off, while others might have a small screw to loosen. Before you disconnect anything, take a clear photo of the existing wire connections with your phone. This picture will be your best friend in a few minutes. Your new thermostat kit should include small sticker labels. Use them to label each wire according to the terminal it's connected to (for example, R, G, Y, W, C). This step is crucial for avoiding confusion later. Once every wire is labeled, you can carefully disconnect them and remove the old thermostat's backplate from the wall.
Step 4: Mount the New Base Plate
Now it's time to position the new thermostat's base plate on the wall. Thread the wires through the opening in the center of the plate. Most smart thermostats have a built-in level to help you get it perfectly straight, but you can also use a small level of your own. An even base plate not only looks better but also ensures the internal sensors function correctly. Once you have it positioned where you want it, use the included screws to securely mount the plate to the wall. Make sure it’s snug and doesn’t wobble. This solid foundation is key for a professional-looking finish.
Step 5: Connect the Wires to Your New Thermostat
With the base plate mounted, you can connect the wires. This is where your photo and labels from Step 3 come in handy. Match each labeled wire to the corresponding terminal on the new base plate. Many modern thermostats use a simple push-in connector system instead of screws. Just press the terminal button, insert the bare end of the wire, and release the button to lock it in place. Give each wire a gentle tug to make sure it's secure. Double-check that no bare wires are touching each other, as this could cause a short circuit. Take your time here to get it right.
Step 6: Attach the Faceplate and Restore Power
After all the wires are securely connected, gently push any excess wiring back into the hole in the wall. Now, you can attach the new smart thermostat's faceplate. It should snap cleanly onto the base plate. With the thermostat fully assembled, you can head back to the breaker box and flip the power to your HVAC system back on. Your new thermostat should power up within a minute or two, displaying a startup screen or welcome message. If it doesn't power on, the first thing to do is double-check your connections. If you're still stuck, you might need to troubleshoot your HVAC wiring.
Step 7: Configure Settings and Connect to the App
The final step is to get your thermostat connected and configured. Your new device will guide you through the initial setup on its screen. This usually involves connecting it to your home's Wi-Fi network and answering a few questions about your HVAC system (like whether you have a heat pump or just AC). Once it's online, download the manufacturer's app on your smartphone and follow the instructions to link it to your thermostat. This is what gives you remote control over your home's temperature and access to all the energy-saving smart features, like scheduling and learning your habits. Congratulations, you did it
Common Installation Mistakes to Avoid
Even a straightforward DIY project can have a few pitfalls. When it comes to installing your smart thermostat, knowing what not to do is just as important as following the steps correctly. I’ve seen a few common slip-ups that can turn a simple upgrade into a frustrating puzzle. The good news is that they are all completely avoidable. By taking your time and sidestepping these mistakes, you can ensure your installation is smooth, successful, and stress-free. Let’s walk through a few things to watch out for.
Assuming All Wire Colors Are Standard
It’s tempting to think that the red wire always goes to the "R" terminal and the blue wire always goes to "C," but that’s a risky assumption. While there are industry conventions, the wiring in your wall might not follow the rules. The person who installed your last thermostat could have used the colors differently. This is why labeling your wires before you disconnect them is the most important part of the process. Trust the labels you made, not the colors you see. Connecting the wrong wire can, in a worst-case scenario, short out your new thermostat or even damage your HVAC system’s control board.
Skipping the Compatibility Check
Imagine unboxing your shiny new thermostat only to find it won’t work with your air conditioner. It’s a frustrating and completely preventable scenario. Before you even purchase a smart thermostat, take five minutes to check its compatibility with your system. Most major brands, like Google Nest and Ecobee, have a compatibility checker tool on their websites. You’ll simply remove your old thermostat’s faceplate, tell the tool which wires you have, and it will confirm if the model is a match. This is especially important for homes with more complex systems, like multi-stage units or heat pumps, which need specific wiring.
Forgetting Firmware Updates After Installation
You’ve mounted the thermostat, connected the wires, and it powers on. Success! But there’s one more crucial step: updating the firmware. A smart thermostat is a mini-computer, and just like your phone, it runs on software that manufacturers improve over time. Once you connect the device to your Wi-Fi, it will likely prompt you to download the latest version. Don’t skip this. These updates often include important security patches, bug fixes, and new features. Following the on-screen prompts to complete the update ensures your thermostat runs efficiently and securely from day one. If you run into any issues, our team is always here to help with air conditioning repair and troubleshooting.
Installing During Extreme Heat or Cold
This one is all about timing and common sense, especially here in Florida. Please don’t try to install your new thermostat in the middle of a July heatwave. While the process is usually quick, you’ll have your power turned off for a bit. If you run into an unexpected snag, you could be left without air conditioning for longer than you planned. Pick a mild day or a cool morning to do the job. This gives you a low-pressure window to work carefully without worrying about the house turning into a sauna. If the unexpected does happen, remember that we offer emergency air conditioning services to get you comfortable again quickly.
How to Troubleshoot Common Installation Issues
You’ve followed the steps, and you’re at the finish line, but something isn’t working quite right. Don’t worry, it happens. A few common issues can pop up after installation. Before you get frustrated, let’s walk through some simple troubleshooting steps. Most of the time, it’s a minor issue you can fix in a few minutes. From a blank screen to a stubborn Wi-Fi connection, these little hiccups can feel like a major setback, but they usually have a straightforward solution. We’ll go through the most frequent problems one by one so you can get your new smart thermostat running and start enjoying that perfect indoor climate.
Thermostat Won't Power On?
A blank screen can be alarming, but the fix is often simple. First, double-check that you’ve turned the power back on at the breaker. It’s an easy step to forget in the excitement of finishing the job. If the power is on but the screen is still dark, the problem is likely the C-wire. Many older homes in Florida don’t have one, and your new thermostat needs it for a continuous power supply. If you’ve confirmed you don’t have a C-wire, you might need to install an adapter. This can get a little tricky, and if you’re not comfortable working with your HVAC system’s wiring, it’s best not to guess. An incorrect connection can cause bigger problems, so when in doubt, it's wise to get professional help with your air conditioning repair.
Having Wi-Fi or App Connection Problems?
If your thermostat is powered on but won't connect to the internet, start with the basics. Carefully follow the instructions on the thermostat screen or in the mobile app to connect to your home’s Wi-Fi network. Make sure you’re entering the correct password; a simple typo is a frequent culprit. Also, consider how far your thermostat is from your router. If the signal is weak, the connection might be unstable. If it still won’t connect, try the classic tech support solution: restart everything. Turn your router, smartphone, and thermostat off and then back on again. This simple reboot can often resolve minor connection glitches. If you’re still stuck, check the thermostat manufacturer’s website for support guides specific to your model.
HVAC System Isn't Responding?
This is a frustrating one: the thermostat is on and connected to Wi-Fi, but your air conditioner won’t kick on. This almost always points to a wiring issue. A single wire in the wrong terminal can prevent the thermostat from communicating with your HVAC system. Go back to the photo you took of your old thermostat’s wiring and compare it to your new setup. Getting the wiring wrong can do more than just prevent your AC from running; it can cause serious damage. For example, a misplaced wire could make your system run nonstop. If you’ve double-checked the connections and it’s still not working, don’t risk it. It’s much cheaper to call a technician than to fix a damaged HVAC unit, especially when the Florida heat is bearing down. If your system is acting strangely, it's time to call for emergency air conditioning services.
When to Call a Professional
While installing a smart thermostat can be a satisfying DIY project, there’s no shame in calling for backup. Your home’s HVAC system is complex, and a small mistake during installation can lead to bigger, more expensive problems. In the Florida heat, you don’t want to risk being without AC because of a wiring mishap. Knowing when to step back and let an expert take over is just as important as knowing which wire goes where. If you hit a snag, feel out of your depth, or just want the assurance that the job is done right the first time, it’s always the right call to get professional help.
Think of it this way: a service call is a small price to pay for peace of mind. A pro can handle tricky wiring, ensure your new thermostat is perfectly compatible with your specific system, and get everything running smoothly in a fraction of the time. It’s about protecting your investment in both your new thermostat and your entire HVAC system. A professional installation guarantees that your thermostat is set up for maximum efficiency, which can save you money on energy bills in the long run. It also ensures your system’s warranty remains intact, which isn't always the case with DIY installations.
Signs the Job Is Best Left to a Pro
Sometimes a project that seems simple on the surface can quickly become complicated. If you open up your old thermostat and the wiring looks like a bowl of spaghetti, or if you just have a gut feeling that you’re in over your head, it’s time to pause. One of the most common roadblocks is discovering you don’t have a C-wire and aren’t comfortable running a new one through your walls. This task can be difficult and is often best left to a professional. If you feel uncertain at any point, getting help is the smartest move. It’s always better to be safe than to risk damaging your HVAC system.
How a Licensed HVAC Technician Can Help
A licensed HVAC technician does more than just connect wires. They ensure your new thermostat is installed correctly and safely, preventing potential damage to your system’s control board. Getting professional help is almost always cheaper than paying for a major air conditioning repair down the line. Our licensed and insured technicians can quickly diagnose wiring issues, handle complex setups (like systems with heat pumps or multiple zones), and confirm that your new device communicates properly with your AC unit. We’ll make sure your smart thermostat is configured for optimal performance, saving you energy and money from day one.
Related Articles
- How to Prepare Your HVAC for a Florida Summer
- Benefits of Regular HVAC Maintenance
- HVAC Tips & Insights Blog - Expert Advice from 5 Star Air
Frequently Asked Questions
How much can I actually save with a smart thermostat in Florida? While the exact savings depend on your home and habits, the potential is significant. The savings don't come from magic; they come from smarter energy use. A smart thermostat learns your schedule and automatically adjusts the temperature when you're away, preventing your AC from cooling an empty house. In a place like Florida where the AC runs constantly, reducing that runtime even a little each day adds up to real money back in your pocket over the year.
I checked and I don't have a C-wire. What are my options? Finding you don't have a C-wire is a common issue, especially in older homes. You have two main paths forward. Some thermostat brands offer a power adapter kit that you can install yourself, but this involves working with the control board on your HVAC unit. If you're not completely comfortable with that, the safest and most reliable option is to have a professional technician run a new wire. It's a straightforward job for an expert and guarantees your new thermostat will have the stable power it needs.
Will a smart thermostat work with an older HVAC system? The age of your HVAC system isn't as important as its wiring. Many older units are perfectly compatible with modern smart thermostats. The key is to use the compatibility checker tool on the thermostat manufacturer's website before you buy anything. You'll just need to pop the front off your current thermostat and input which wires you see. If you're still unsure, a quick service call can give you a definite answer and prevent the headache of buying a device that won't work.
How long should I set aside for this installation? For a straightforward installation where everything goes to plan, you can expect the project to take less than an hour. However, I always recommend blocking out a little extra time, maybe 90 minutes, just so you don't feel rushed. It's also wise to pick a mild day for the project. That way, if you do hit a small snag, your house won't turn into a sauna while the power is off.
Is it really worth paying a professional for this? Think of it as an investment in peace of mind. While many people can install a thermostat successfully, a mistake with the wiring can damage your HVAC system's control board, which is a much more expensive fix. A professional ensures the job is done right the first time, protects your equipment, and confirms your new thermostat is configured for maximum efficiency. If you feel even slightly uncertain, calling a pro is the smartest and safest decision.