Thermostat Wiring 101: Your Complete DIY Guide
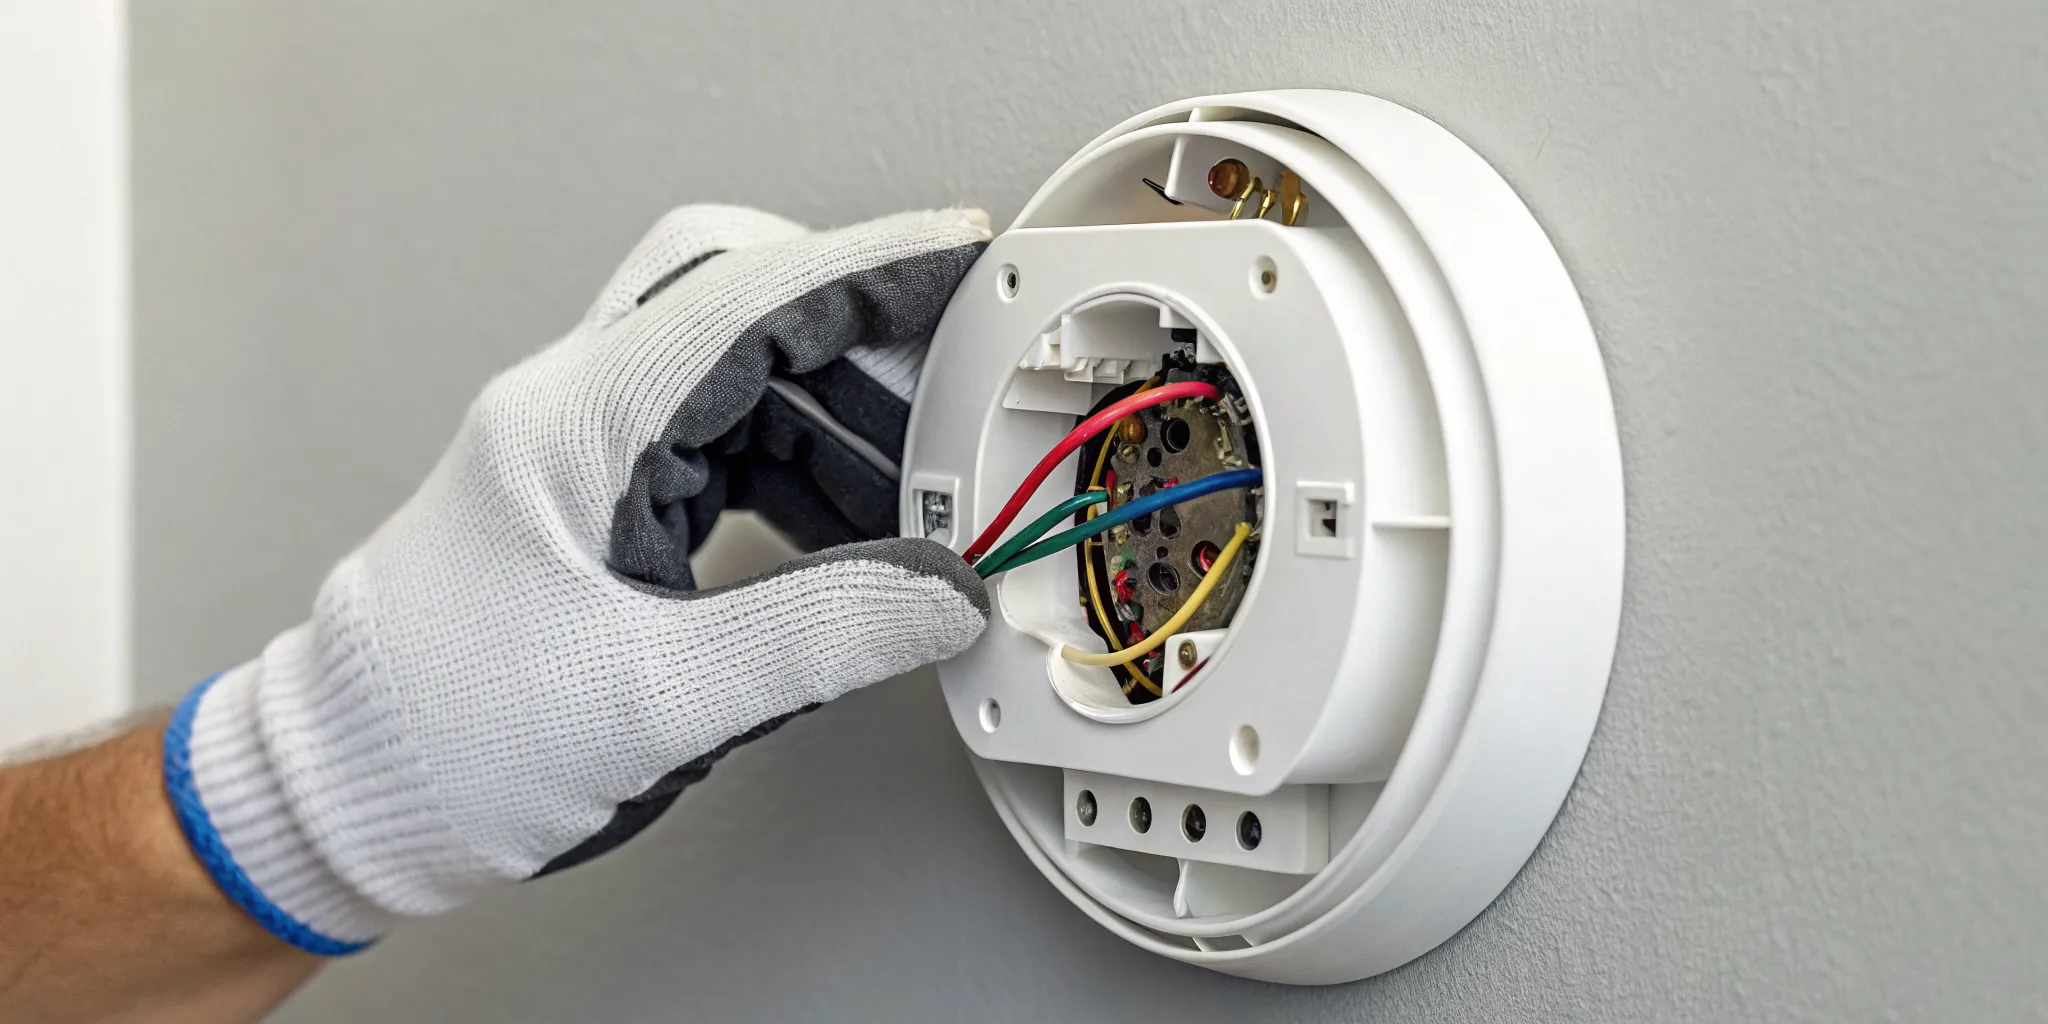
Your thermostat plays a bigger role in your monthly energy bill than you might think. If it isn’t communicating correctly with your HVAC system, you could be wasting energy and money without even realizing it. The culprit is often faulty or incorrect thermostat wiring, which can cause your AC to run longer than necessary or cycle inefficiently. Getting the wiring right ensures your system operates exactly as intended. This is especially true for smart thermostats, which promise significant savings but only deliver if installed properly. Let’s explore how these connections work and how to ensure they’re helping, not hurting, your budget.
Key Takeaways
- Set Yourself Up for Success: Before touching any wires, always turn off the power at the breaker, take a photo of the old wiring, and label each wire according to its terminal letter. These three steps are your roadmap and prevent most common installation mistakes.
- Focus on the Terminal Letters, Not the Wire Colors: Wire colors are not always a reliable guide, especially in older homes. The lettered terminals (like R, W, Y, and C) on the thermostat's wall plate are the only guaranteed way to know each wire's specific job.
- Recognize When to Call for Help: If you encounter complex wiring, don't have a C-wire for a smart thermostat, or simply feel unsure, calling a professional is the smartest move. It protects your HVAC system from damage and ensures the job is done right.
What Is Thermostat Wiring?
If you’ve ever taken your thermostat off the wall, you’ve seen the small bundle of colorful wires connected to it. This is your thermostat wiring, and it’s the communication hub for your entire HVAC system. Think of it as the nervous system for your home’s comfort. Each color-coded wire connects to a specific lettered terminal on the thermostat’s wall plate, and each terminal controls a different function, like heating, cooling, or the fan.
Understanding what these wires do is the first step in troubleshooting an issue or upgrading to a new thermostat. While it might look like a complicated web, the system is surprisingly logical. Once you know the role of each wire, you can feel much more confident about managing your home’s climate. Let’s break down how it all works and why getting it right is so important.
How Your Thermostat Talks to Your HVAC
Your thermostat acts as a smart switch for your HVAC system. It’s powered by a low-voltage 24-volt transformer, with the main power typically carried by a red wire (the R wire). When you adjust the temperature, the thermostat sends a signal through a specific wire to tell your air conditioner, furnace, or fan to turn on or off. For many modern thermostats, a common wire (the C wire) is also needed to complete the circuit and provide continuous power. This constant connection is what allows for features like a backlit screen and Wi-Fi connectivity, which are essential for managing your home’s indoor air quality.
Understanding 2-Wire vs. Multi-Wire Setups
The number of wires behind your thermostat depends on your HVAC system’s capabilities. A simple, heat-only system might only have two wires (usually a red and a white one) that act like a basic light switch to turn the furnace on and off. However, most modern homes have more complex setups. You’ll typically find around five wires, though some systems can have as many as ten. These multi-wire configurations have dedicated wires for heating, cooling, fan control, and power. When you’re considering a new air conditioning installation, the technician will ensure the wiring matches the new system’s requirements for optimal performance.
Why Correct Wiring Is a Big Deal
While replacing a thermostat can be a straightforward DIY project, it’s one where precision matters. If you connect the wires incorrectly, you could cause a range of problems. A simple mistake might just blow a fuse in your air handler, but a more serious one could damage your thermostat or even your entire HVAC system. It could also void your equipment’s warranty, leaving you on the hook for expensive repairs. Before you touch a single wire, always turn off the power to your HVAC system at the circuit breaker. If you feel even slightly unsure about the process, calling a professional for air conditioning repair is the safest and smartest choice.
Decoding Thermostat Wire Colors
When you take the cover off your thermostat, you’ll see a rainbow of wires. It might look complicated, but there’s a method to the madness. Most HVAC systems use a standard color code to help identify what each wire does. Think of it as a universal language that helps your thermostat communicate with your heating and cooling equipment. Understanding this code is the first step to successfully tackling a DIY thermostat replacement or troubleshooting a simple issue.
While these colors are standard, they aren't a strict rule. Sometimes an installer might use a different color if they run out of the standard one. That’s why it’s so important to pay attention to the lettered terminals the wires are connected to, not just the colors themselves. Before you disconnect anything, always snap a quick photo of the current wiring setup. This picture will be your best friend and a reliable map to follow. Let’s break down what each color typically means for your system.
Red (R, Rc, Rh): The Power Wires
The red wire is the lifeblood of your thermostat, providing its 24-volt power supply. You might see a single red wire connected to the R terminal. However, if you have separate systems for heating and cooling, you may see two red wires. In this case, Rc powers the cooling system (the "c" stands for cool) and Rh powers the heating system (the "h" stands for heat). If you only have one red wire but separate Rc and Rh terminals, a small metal clip called a jumper usually connects them, allowing that single wire to power both functions.
White (W): The Heating Wire
The white wire is your heating connection. When you set your thermostat to heat, it sends a signal through the white wire to activate your furnace or heat pump. Here in Florida, we don't rely on our heaters as much as our friends up north, but having a functional heating system is still important for those occasional chilly nights. If your heat isn't turning on, a problem with the white wire's connection could be the culprit. Regular air conditioning maintenance ensures all your system's components, including heating, are ready when you need them.
Yellow (Y): The Cooling Wire
For us in Florida, the yellow wire is one of the most important connections. This wire controls your cooling system. When your home gets too warm, the thermostat sends a signal through the yellow wire to turn on your air conditioner's compressor. If your AC unit won't kick on but the fan is running, an issue with the yellow wire connection at the thermostat or the AC unit itself might be to blame. A faulty connection here can leave you sweating, so ensuring it's secure is key to staying cool. If you suspect a problem, it might be time for a professional air conditioning repair.
Green (G): The Fan Wire
The green wire controls the fan that blows air through your home's vents. This wire allows you to run the fan independently of your heating or cooling system by setting your thermostat to "Fan On." This is a great way to circulate air and improve your home's ventilation without running the compressor, which uses more energy. Keeping the air moving helps maintain better indoor air quality by preventing stagnant air and helping your filters capture more particles. If your fan doesn't turn on at all, the green wire's connection is the first place to check.
Orange (O): The Heat Pump Wire
If you have a heat pump, you’ll likely see an orange wire. Heat pumps are fantastic for Florida's climate because they can both heat and cool your home. The orange wire is responsible for controlling the reversing valve, which switches the unit from cooling mode to heating mode. When the thermostat calls for heat, it energizes the orange wire to make the switch. Some systems, particularly from the brand Rheem or Ruud, may use a dark blue wire (labeled B) for this same function, so it's always good to double-check your system's manual.
Blue (C): The Common Wire for Smart Thermostats
The blue wire, often labeled "C" for "common," provides a continuous flow of 24-volt power to your thermostat. While older, simpler thermostats didn't need it, the C-wire is essential for most modern smart thermostats. This constant power is what runs features like a backlit digital display, Wi-Fi connectivity, and a responsive touchscreen. If you're upgrading to a smart thermostat and don't have a C-wire, you may need to have one installed to ensure your new device works correctly and doesn't cause issues with your HVAC system.
What to Do If Your Wire Colors Don't Match
It can be a little alarming to open your thermostat and find that the wire colors don't line up with the standard guide. Don't panic. This happens sometimes, especially in older homes or if a non-standard cable was used during installation. The most important thing is to ignore the color and focus on the lettered terminal each wire is connected to. Your photo of the old wiring is your guide here. Label each wire with a piece of tape corresponding to its terminal letter (R, W, Y, etc.) before you disconnect anything. If you're still confused or the wiring seems overly complex, it's always best to contact us. A professional can sort it out safely and ensure your system runs perfectly.
What Do the Terminal Labels Mean?
While wire colors give you a hint, the small letters next to the screws on your thermostat’s wall plate are the real source of truth. Think of these terminal labels as the official job titles for each wire. They tell you exactly what function each wire controls, from heating to cooling to powering the fan. Understanding these labels is the key to getting your wiring right and avoiding a frustrating situation where your AC won’t turn on in the middle of a Florida summer. A simple mix-up here isn’t just an inconvenience; it can prevent your system from working correctly or even cause damage to sensitive components. Before you disconnect anything, taking the time to decode these labels will save you a major headache later. It’s the most important step in ensuring your new thermostat communicates properly with your HVAC system from the moment you install it. We’ll walk through the common labels you’ll see, what they mean for different types of systems, and how to create your own simple wiring diagram so you can tackle this project with confidence.
A Quick Guide to Common Terminal Labels
Most thermostats use a standard set of labels, so getting to know them will make your replacement project much smoother. Here are the most common ones you’ll see and what they do:
- R, Rh, and Rc: These are the power lines. R is the main 24-volt power from the transformer. If you have separate heating and cooling systems, you’ll see Rh (power for heat) and Rc (power for cool).
- W: This terminal controls your heating system.
- Y: This one is for your cooling system, telling your air conditioner’s compressor to kick on.
- G: This controls the blower fan inside your air handler.
- C: The “common” wire provides a continuous return path for power, which is essential for most smart thermostats to keep their screens on and Wi-Fi connected.
Single-Stage vs. Multi-Stage Systems
Your home might have a single-stage or multi-stage HVAC system. A single-stage system is simple: it’s either on at full blast or completely off. A multi-stage system, however, can run at different speeds for greater efficiency and comfort. If you have a multi-stage system, you’ll see extra terminals like W2 for the second stage of heating and Y2 for the second stage of cooling. These more advanced setups are common in newer, high-efficiency units. If you're considering an upgrade, a new air conditioning installation can offer significant energy savings with these modern features that better manage your home's temperature.
Special Terminals for Heat Pumps
Heat pumps are a popular, energy-efficient choice in Florida because they can both heat and cool your home. They use a special component called a reversing valve to switch between modes, and your thermostat controls this with either an O or a B wire. The O terminal is the most common and tells the valve to switch to cooling mode. The B terminal tells it to switch to heating mode. Your system will use one or the other, but never both. Connecting this wire to the wrong terminal will cause your system to heat when it should be cooling, and vice-versa, which is the last thing you want on a hot afternoon.
How to Read a Wiring Diagram
Before you touch a single wire, pull out your phone and snap a clear picture of your old thermostat’s wiring. This photo is your most valuable tool. It serves as a perfect wiring diagram, showing you exactly where each wire belongs. When you start moving wires, always identify them by the terminal label they were connected to, not just by their color. You can write it down or use the little stickers that often come with a new thermostat. If you open the plate and the wiring looks like a tangled mess or you feel unsure, don't guess. It's always better to call for professional air conditioning repair than to risk damaging your system.
What Tools Will You Need?
Before you start unscrewing your old thermostat, it’s smart to gather all your tools. Having everything you need within arm's reach will make the process much smoother and, more importantly, safer. Think of it like prepping your ingredients before you start cooking; it just makes everything easier. Most of these are common household tools, but one of them is absolutely essential for your safety.
Your Thermostat Wiring Tool Checklist
Getting your toolkit ready is the first real step of the job. A little preparation here saves you from running back and forth to the garage later. Here’s a quick checklist of what you’ll need to tackle your thermostat wiring:
- Screwdriver Set: You’ll likely need both a small Phillips head and a flathead screwdriver to remove the old thermostat and secure the new one.
- Wire Strippers: These are for carefully removing about a quarter-inch of the plastic insulation from the wire tips to ensure a clean, solid connection.
- Pliers: A pair of needle-nose pliers is perfect for bending wires neatly around the terminal screws.
- Drill (Optional): You might need a drill if the mounting holes for your new thermostat don’t line up with the old ones.
- Voltage Tester: This is the most important tool on the list. It’s a non-negotiable for confirming the power is off before you touch any wires.
Using a Voltage Tester Safely
I can’t say this enough: your safety is the top priority. A voltage tester is a simple device that confirms whether electrical wires are live. Using one is the only way to be absolutely sure the power is off before you begin working. This quick check is what stands between a successful DIY project and a dangerous electrical shock.
Always test the wires after you’ve turned off the power at the circuit breaker. A non-contact voltage tester is a great, user-friendly option; it will light up or beep if it detects a current, so you don’t even have to touch the wires directly. Before you start, take a moment to read the instructions for your specific tester to make sure you’re using it correctly. This simple step is crucial for your peace of mind.
How to Replace Your Thermostat: A Step-by-Step Guide
Ready to upgrade your thermostat? It's a project many homeowners can handle themselves with a little patience and the right instructions. Following these steps carefully will help you get the job done safely and correctly. This guide will walk you through the process, from turning off the power to testing your new device. We'll cover everything you need to know to make this a successful weekend project. Just remember, your HVAC system is a complex piece of equipment. While this guide is thorough, every home's wiring can have its own quirks. If you ever feel unsure, run into wiring that doesn't match, or just decide you'd rather have an expert handle it, it's always best to contact a professional. Your safety and the health of your AC system are what matter most, and our licensed technicians are always here to help ensure your new thermostat is installed perfectly.
Step 1: Turn Off the Power
This is the most important step, so please don’t skip it. Before you touch a single wire, go to your home's breaker box and turn off the power to your heating and cooling system. This simple action prevents any risk of electrical shock and protects your HVAC equipment from getting damaged during the installation. If you aren't sure which breaker controls your system, you can turn off the main breaker to be extra safe. Just be sure to give a heads-up to anyone else at home first! This is the first rule of any electrical work, and it ensures you can focus on the task without worrying about safety.
Step 2: Snap a Photo of the Old Wiring
Before you disconnect anything, pull out your phone and take a clear picture of your current thermostat's wiring setup. Make sure you can easily see which wire goes to which terminal label (the little letters like R, W, and G). This photo will be your best friend and your go-to guide for the rest of the installation. It takes only a few seconds and can save you from a major headache later. Trust me on this one; it's an invaluable step that makes the whole process smoother. Don't just rely on memory, as this visual map is the key to a stress-free installation.
Step 3: Label Each Wire
With your reference photo taken, it's time to label. Most new thermostats come with a sheet of small stickers for this exact purpose. As you disconnect each wire from the old thermostat, place the corresponding sticker on it. For example, the wire from the "W" terminal gets the "W" label. This, combined with your photo, creates a foolproof system to ensure every wire goes to the right place on your new thermostat. Don't rely on wire color alone, since the colors aren't always standard. The terminal letter is what truly matters, and labels are the key to accuracy.
Step 4: Disconnect the Old Thermostat
Once every wire is labeled, you can finish disconnecting them and remove the old thermostat's wall plate. The wires can be a bit springy and might try to slip back into the wall. To prevent this, you can gently wrap them around a pencil or pen to hold them in place while you work. Take a moment to clean any dust or grime off the wall before you move on to installing the new mounting plate. This ensures your new thermostat sits flush and looks great. A clean slate makes for a much cleaner and more professional-looking final result.
Step 5: Connect Wires to Your New Thermostat
Now it's time to install your new thermostat. Start by mounting the new wall plate, then grab your labeled wires. Using your photo and the labels as a guide, connect each wire to the correct terminal on the new device. Match the letter on the wire's label to the corresponding terminal and make sure each wire is inserted securely. If the process feels confusing or your wiring doesn't seem to match up, it might be a good time to pause. A professional air conditioning installation expert can handle it from here, ensuring everything is connected correctly and safely.
Step 6: Restore Power and Test Your Work
After all the wires are securely connected, attach the faceplate of your new thermostat. Now, head back to the breaker box and turn the power to your HVAC system back on. Your new thermostat should power up. Go ahead and test it out. Turn on the AC and make sure cool air starts blowing. Then, switch it to heat to confirm that works, too. Following the manufacturer's instructions, set up any schedules or smart features. Congratulations, you did it! You've successfully replaced your thermostat and taken another step toward a more comfortable and efficient home.
Common Wiring Mistakes to Avoid
Tackling your thermostat wiring is a great DIY project, but a few common slip-ups can turn a quick job into a major headache. Trust me, I've heard the stories. Taking a few extra minutes to avoid these pitfalls will save you from a frustrating afternoon and a potentially expensive repair call. Let's walk through the mistakes I see most often so you can get your installation right on the first try.
Assuming Wire Colors Are Always Standard
While the color-coding system for thermostat wires is helpful, it’s more of a guideline than a strict rule. You might open up your wall plate to find that the wire colors don't match the standard conventions at all, especially in older homes. Relying only on color is a gamble. The only source of truth is the letter on the terminal where the wire is connected. Always check the wiring diagram that came with your thermostat or HVAC system. If you connect the wrong wire based on a color assumption, you could end up with a system that doesn't work or, worse, cause damage that requires professional air conditioning repair.
Skipping the C-Wire on a Smart Thermostat
If you're upgrading to a smart thermostat, the C-wire (or "common" wire) is your best friend. This wire provides a continuous flow of power to the thermostat, which is necessary for features like Wi-Fi connectivity and a bright touchscreen. Some thermostats claim they can work without one, but they often do so by "stealing" power from other circuits, which can cause your HVAC system to behave erratically. If you don't have a C-wire, it's worth having one installed. It’s a key part of a modern air conditioning installation and ensures your new gadget works flawlessly from day one.
Forgetting to Label Wires First
Before you disconnect a single wire from your old thermostat, stop and grab your phone and some tape. First, take a clear picture of the current wiring setup, showing which wire goes to which terminal. Next, use small pieces of masking tape to label each wire with the letter of the terminal it's connected to (R, G, Y, etc.). This simple step creates a perfect roadmap for your new installation and removes all the guesswork. It turns a potentially confusing puzzle into a simple connect-the-dots task. Without labels, you’re relying on memory, and it’s incredibly easy to mix things up.
Not Turning Off the Breaker
This is the most important rule of any electrical project: always turn off the power first. Before you even remove the old thermostat's faceplate, go to your home's breaker box and shut off the power to your HVAC system. Forgetting this step can lead to a blown fuse in your air handler, a fried circuit board in your brand-new thermostat, or even a dangerous electrical shock. It takes just a few seconds and protects you and your equipment from costly damage. Accidentally shorting a wire could leave you without AC, forcing a call for emergency air conditioning services on a hot Florida day.
How to Troubleshoot Wiring Problems
Even when you follow the instructions perfectly, sometimes things just don’t work right the first time. Don’t panic! Most thermostat wiring issues are simple to fix. Before you start unscrewing things again, walk through these common troubleshooting steps. We’ll cover the most frequent hiccups, from a thermostat that won’t power on to a fan that just won’t quit. Remember, your safety is the top priority, so always proceed with caution. If you ever feel unsure or the problem seems bigger than a simple loose wire, it’s always best to call for professional help.
Thermostat Has No Power?
A blank thermostat screen is a frustrating sight, especially on a hot Florida day. The first and simplest thing to check is your circuit breaker. Has it tripped? If resetting the breaker doesn’t solve it, the issue might be the C-wire, which provides continuous power to the thermostat. Make sure it’s securely connected to the C terminal on both your thermostat and at your HVAC system’s control board. If you don’t have a C-wire, your smart thermostat won’t work without an adapter. If you’ve checked these things and are still without power, it could be a deeper issue. When you need your AC back on fast, our team offers emergency air conditioning services to diagnose and fix the problem quickly.
AC or Heat Won't Turn On?
If your thermostat has power but your air conditioner or heater isn’t responding, there’s likely a communication breakdown. This often points to an issue with the specific wire for that function. An incorrect connection can blow a fuse or even damage your system, so it’s important to be careful. First, turn off the power at the breaker. Then, double-check that the yellow (Y) wire is secure in its terminal for cooling, and the white (W) wire is secure for heating. A wire that came loose during installation is a common culprit. If the wires look good, you may have a blown fuse in your air handler. If you’re not comfortable checking that, it’s a good time to schedule an air conditioning repair visit.
Fan Runs Constantly?
Is your HVAC fan running 24/7, even when the cooling or heating isn’t on? This is a classic sign of a wiring mix-up or a simple settings error. Before you do anything else, check your thermostat’s fan setting. It’s very easy to accidentally switch it from “Auto” to “On.” If the setting is on “Auto,” the problem is likely with the green (G) wire, which controls the fan. Turn off the power and inspect the G wire connection at the thermostat. Make sure it’s firmly in the G terminal and not accidentally touching any other metal contacts or wires. A constantly running fan can also be a symptom of other system issues, which can be identified during a routine air conditioning maintenance check.
Checking for Loose or Corroded Wires
A solid connection is everything in thermostat wiring. If you’re experiencing intermittent issues, a loose or corroded wire could be the cause. After shutting off the power at the breaker, remove the thermostat faceplate. Gently tug on each wire to make sure it’s securely fastened in its terminal. In our humid Florida climate, corrosion is also a possibility. Look for any greenish or white crusty buildup on the copper wires or terminals. If you see corrosion, it’s best to have a professional handle it. This is where taking a photo of your original wiring really pays off, as you can reference it to make sure everything is still in the right place. If anything looks off, it's best to contact us for a professional opinion.
Always Check the Circuit Breaker First
This tip is so important it’s worth repeating: always check your circuit breaker. It should be your first step for troubleshooting and your first step for safety. If your thermostat or HVAC system suddenly stops working, head to your electrical panel and see if the breaker for your HVAC unit has tripped. If it has, you can try resetting it once. If it trips again, leave it off and call a professional, as this indicates a more serious electrical problem. And before you ever touch a single wire on your thermostat, you must turn the power off at the breaker. You can confirm the power is off by trying to turn your system on from the thermostat; if nothing happens after a few minutes, you’re safe to proceed.
Can Wiring Affect Your Energy Bill?
Absolutely. While thermostat wires don't use much electricity themselves, they are the communication lines for your entire HVAC system. Think of them as the nervous system connecting the brain (your thermostat) to the body (your AC and furnace). If the signals get crossed, your system can’t run efficiently. Faulty wiring can cause your AC to run longer than needed, cycle on and off erratically, or fail to respond to temperature changes, all of which wastes energy and inflates your monthly bill.
Correct wiring ensures your system operates exactly as intended, which is the first step toward an energy-efficient home. This is especially true for modern smart thermostats that offer significant savings, but only if they’re installed properly.
How Faulty Wiring Strains Your HVAC System
Incorrect thermostat wiring can put serious, unnecessary strain on your HVAC system. When wires are mismatched, your thermostat might send the wrong signals. For example, it could tell your AC to turn on when it should be off, or prevent it from shutting down when your home is cool enough. This constant, incorrect operation doesn't just waste electricity; it also causes premature wear and tear on expensive components like your compressor and fan motor.
Given the variety of HVAC equipment and how different manufacturers handle wiring, it’s an easy mistake to make. A system that’s working harder than it needs to is an inefficient one, and that inefficiency shows up directly on your energy bill and can lead to a need for air conditioning repair.
Why the C-Wire Is Key for Smart Thermostat Efficiency
If you’re upgrading to a smart thermostat, the C-wire (or “common” wire) is your most important connection for energy efficiency. The C-wire provides a continuous, low-voltage power source from your HVAC system to the thermostat. This is essential for power-hungry features like Wi-Fi connectivity, backlit touchscreens, and advanced sensors that make smart thermostats so effective.
Without a C-wire, some smart thermostats try to “steal” power by pulsing the heating or cooling circuits, which can cause your system to behave erratically or even damage the control board over time. For Floridians looking to maximize savings with a smart thermostat, a properly connected C-wire is non-negotiable. It ensures your thermostat works flawlessly, helping you realize its full energy-saving potential with a new air conditioning installation.
Is a Smart Thermostat Upgrade Right for You?
Thinking about switching to a smart thermostat? It’s easy to see the appeal. The idea of adjusting your home’s temperature from your phone or having your thermostat automatically learn your schedule sounds pretty great. These devices promise convenience and energy savings, but the real question is whether it’s the right move for your specific home and lifestyle. Before you add one to your online cart, there are a couple of key things to consider.
First, you’ll need to check if your current HVAC system’s wiring is compatible. Not all systems are plug-and-play, and a quick look behind your current thermostat can tell you a lot. Second, it’s worth thinking about how you’ll actually use the features. For us here in Florida, where the AC runs almost constantly, the benefits of remote access and optimized cooling schedules can be significant. A smart thermostat isn’t just a cool gadget; it’s a tool that can make your home more comfortable and your energy bills more manageable. Let’s walk through what you need to know to decide if this upgrade makes sense for you.
Checking Compatibility with Your Current Wiring
The biggest hurdle for a DIY smart thermostat installation is often the wiring. Most smart thermostats require a common wire, or C-wire, to get a continuous flow of power. This wire keeps the screen lit and the Wi-Fi connected without interrupting your HVAC’s normal function. To see what you’re working with, turn off the power to your HVAC system at the breaker, then gently pop the cover off your current thermostat. You’ll likely see a bundle of small, colored wires, and five is a pretty common number. If you see a wire connected to the "C" terminal, you’re in great shape. This C-wire provides continuous 24-volt power that most smart devices need. If you don’t have one, don’t worry. An adapter can often be installed, but it’s a job best left to a professional to ensure it’s done safely and correctly.
Remote Access and Savings in the Florida Climate
In Florida, our air conditioners work hard. A smart thermostat gives you more control over that hard work, which can lead to real savings. Imagine being able to turn down the AC from your phone after you’ve left for the day or cooling the house to the perfect temperature on your way home from the beach. That convenience is a major perk. Beyond that, smart thermostats can help you save on energy costs by learning your daily routines and creating optimized cooling schedules. They can automatically adjust the temperature when you’re away and ensure the house is comfortable when you return, preventing your system from running at full blast all day. When paired with a high-efficiency unit, a smart thermostat is a powerful tool for managing comfort and costs. If you're considering a bigger upgrade, we can help you choose the right air conditioning installation for maximum efficiency.
When to Call a Professional for Thermostat Wiring
While tackling a DIY project can be incredibly satisfying, it’s also important to know when to pass the torch to a professional. When it comes to thermostat wiring, a small mistake can lead to big headaches, from a non-working AC unit to costly system damage. Think of it less as giving up and more as making a smart, strategic decision to protect your home and your HVAC system. Your air conditioner is one of the most expensive and complex appliances in your home, especially here in Florida where it runs almost constantly.
If you open up your thermostat and feel a wave of confusion, that’s your first sign. Some wiring setups are simply not designed for a DIY approach. Complex systems, like those with heat pumps or multiple stages of heating and cooling, require specific knowledge to wire correctly. Pushing through when you’re unsure can do more harm than good. Recognizing that a job is beyond your current skill set is a sign of a savvy homeowner, not a failed DIYer. When in doubt, calling for a professional opinion is always the safest bet for air conditioning repair.
Signs the Job Is Too Complex for DIY
Take a look at your current thermostat’s wiring. If you see any of the following, it’s time to put the tools down and call an expert. If your system is a "dual-fuel" setup (meaning it uses both a heat pump and a gas furnace), the wiring is far more intricate than a standard system. You should also call a pro if you see terminals labeled with letters like A, B, C, or numbers like 1, 2, 3. This indicates a "communicating" system that isn’t compatible with most off-the-shelf thermostats. Finally, if you have a modern multi-stage system with extra wires (like W2 or Y2), it’s best to leave the job to someone with professional training.
The Risks of Getting It Wrong
Trying to force a DIY solution on a complex wiring job can go wrong in a few ways. An incorrect connection can blow a fuse in your HVAC system, leaving you without air conditioning until it’s fixed. In a worst-case scenario, you could damage the thermostat itself, fry the main circuit board of your HVAC unit, or even risk an electrical shock. These mistakes can be expensive to fix and may even void your thermostat’s warranty. It’s a gamble that’s just not worth taking when your home’s comfort and safety are on the line.
How a Licensed Technician Makes It Easy
When you feel out of your depth, our licensed technicians are here to make it easy. We handle thermostat wiring every day and can quickly and safely identify your system’s needs. We’ll ensure your new thermostat is wired correctly, protecting your HVAC system and your warranty. You get the peace of mind that comes from knowing the job was done right the first time, without any of the risks or stress of a complicated DIY project. That’s the core of our 5-star service guarantee: honest expertise you can rely on.
Related Articles
- Prepare Your HVAC for a Florida Summer
- Benefits of Regular HVAC Maintenance
- HVAC Tips & Insights Blog - Expert Advice from 5 Star Air
Frequently Asked Questions
What if my wire colors don't match the letters on the terminals? This is a very common situation, especially in older homes. The most important rule is to trust the terminal letter, not the wire color. Before you disconnect anything, take a clear photo of your current setup. Then, use small pieces of tape to label each wire with the letter of the terminal it's connected to (R, Y, W, etc.). This method ensures you have a perfect map to follow when connecting your new thermostat, regardless of what the colors are.
My new smart thermostat says it doesn't need a C-wire. Is that true? While some smart thermostats can function without a C-wire by "stealing" tiny sips of power from other circuits, it's not the ideal setup. This power-stealing method can sometimes cause your HVAC system to cycle on and off unexpectedly or make a faint buzzing sound. For a stable, reliable connection that protects your HVAC equipment, providing continuous power with a C-wire is always the best practice, especially for a system that works as hard as ours do in Florida.
I followed the steps, but now my AC won't turn on. What's the most common reason for this? First, don't panic. The most common culprit is often the simplest. Head to your breaker box and make sure the breaker for your HVAC system didn't trip; if it did, reset it once. If the power is fine, the issue is likely a loose connection. Turn the power back off and double-check that the yellow wire (the Y wire) is securely fastened in its terminal, as this is the wire that tells your air conditioner to start cooling.
Can I damage my HVAC system by wiring the thermostat incorrectly? Yes, unfortunately, you can. A simple mistake might just blow a low-voltage fuse in your air handler, which is a relatively easy fix. However, a more serious mix-up could send power to the wrong place and damage the thermostat's internal components or, in a worst-case scenario, fry the main control board in your HVAC unit. This is why it's so important to turn off the power and be 100 percent sure of your connections before you proceed.
My old thermostat worked fine. Is it really worth upgrading to a smart one in Florida? For many Florida homeowners, the answer is a definite yes. A smart thermostat gives you incredible control over your cooling, which is our biggest energy expense. You can adjust the temperature from anywhere, set detailed schedules that match your life, and let the thermostat learn your habits to save energy automatically. Over time, the savings on your electricity bill can often pay for the thermostat itself, all while making your home more comfortable.